Adding and customizing actions in the search hover panel
This post is over a year old, some of this information may be out of date.
Adding custom actions to a search hover panel is completely different than when you are doing it for an item/document callout. When adding a custom action to item or document callout you will be able to override the default footer with your own custom actions. These things can be done without touching any of the existing JavaScript files (add a custom action - add a custom action for a specific file type).
Now if you want to add custom actions to a search hover panel, the approach is completely different. First of all you need to know that a visualized search item uses multiple display templates:
- The item display template: Item_Excel.js;
- The hover panel display template: Item_Excel_HoverPanel.js;
- A header display template: Item_CommonHoverPanel_Header.js;
- A body display template: Item_CommonHoverPanel_Body.js;
- A footer display template or hover panel actions template: Item_CommonHoverPanel_Actions.js. The last one, the footer display template is used to render the hover panel actions onto your hover panel.
There are a couple of blog posts that can be found on internet which explain how you could achieve it. One of these solutions can be found on Technet: How to add a custom action to the hover panel in SharePoint Server 2013.
All of these blog posts are showing the same approach, which is by modifying the Item_Common_HoverPanel_Actions display template (_catalogs/masterpage/Display Templates/Search/Item_CommonHoverPanel_Actions.html).
I am not a fan of this approach because it has two downsides:
- You are modifying an out-of-the-box template. So if a update gets pushed from SharePoint, it could be that the template gets overridden;
- If you modify this template, you are doing a modification that impacts all the search hover panels. What I explain in this blog post is a couple of approaches on how you could achieve it by not touching the default hover panel actions display template.
First approach: adding or changing a custom action for all hover panels
The first approach is probably the easiest one. In this approach the default hover panel actions template reference gets overridden via JavaScript.
First create a copy of the Item_Common_HoverPanel_Actions display template, which can be found on the following location: _catalogs/masterpage/Display Templates/Search/Item_CommonHoverPanel_Actions.html.
Once you made your copy, make changes in your version of the display template. This could either be a modification of an existing action or adding an additional action. When you made these modifications to the display template, some code needs to be added in order to make sure that the template gets loaded in your search center.
The way that this can be achieved is by overriding the property value in which the default hover panel actions display template is stored. Here is the code how you can achieve this:
if (typeof HP === "undefined") { SP.SOD.executeFunc("searchui.js", "HP_initialize", function () { HP.CommonActions = "~sitecollection/_catalogs/masterpage/SearchDT/Item_CommonHoverPanel_Actions.js"; });}HP.CommonActions is the property that contains the reference to the actions display template. If you override this property with the reference to your display template, it will load your version instead of the default one.
This piece of code can be added in a script editor web part on the page, in a custom JavaScript file that gets loaded, or in your item display templates.
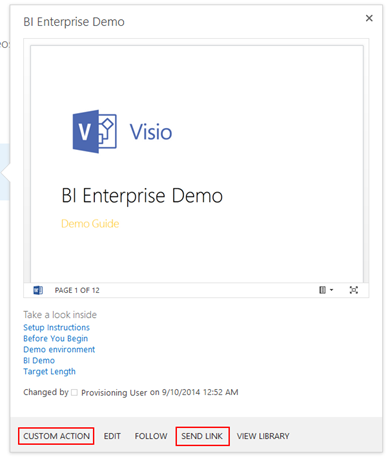
Once you refresh your page, you should see the change to your search hover panel actions:
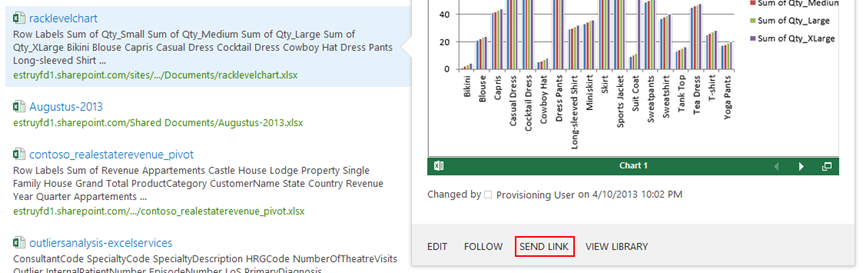
In this example I have changed the send action text to send link.
Approach evaluation
As I said, this is an easy approach. The advantage is that you can quickly override the default hover panel actions template by your own version.
The disadvantage of this approach is that you change the template actions of all the hover panels. So if you only want to do this for a specific type of data, this is not the best approach.
Second approach: adding a custom action for a specific display template
This approach can only be used if you want to add a custom action, you will not be able to make changes to existing actions. In this approach you create a copy of the item and hover templates to which you want to add your custom actions.
In this example I am going to copy the search templates for a Word file:
- _catalogs/masterpage/Display Templates/Search/Item_Word.html
- _catalogs/masterpage/Display Templates/Search/Item_Word_HoverPanel.html
The first thing to do is changing the title of the template in the Item_Word.html file.

The next thing to change is the location of the copied hover panel display template. This reference is stored in a variable named hoverUrl. Find it in your item display template and update it to the location of your version. For example:
// Old valuevar hoverUrl = "~sitecollection/_catalogs/masterpage/Display Templates/Search/Item_Word_HoverPanel.js";
// New valuevar hoverUrl = "~sitecollection/_catalogs/masterpage/SearchDT/Item_Word_HoverPanel.js";Now the item display template is finished, and the custom action can be added to the hover panel template.
In the hover panel display template, you will find an element with the following class: ms-srch-hover-actions. The content of element looks like this:
<div id="_#= $htmlEncode(id + HP.ids.actions) =#_" class="ms-srch-hover-actions"> _#= ctx.RenderFooter(ctx) =#_</div>All you need to do is to add your own custom action by adding some additional markup. This can either be added before or after the ctx.RenderFooter(ctx) function call. Here is an example of how to add it in front of the default actions:
<div id="_#= $htmlEncode(id + HP.ids.actions) =#_" class="ms-srch-hover-actions"> <div class="ms-srch-hover-action"> <a href="#" title="Custom action" class="ms-calloutLink ms-uppercase">Custom action</a> </div>
_#= ctx.RenderFooter(ctx) =#_</div>The final step is to make a copy of the result type (in my example the one for Microsoft Word) and link your display template. This step is necessary in order to make sure that your templates get loaded instead of the default ones.
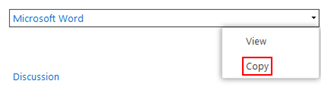
The copy can be made by going to Site settings > Search Result Types. Click on Microsoft Word (or the result type you want to copy) and click on the copy action:
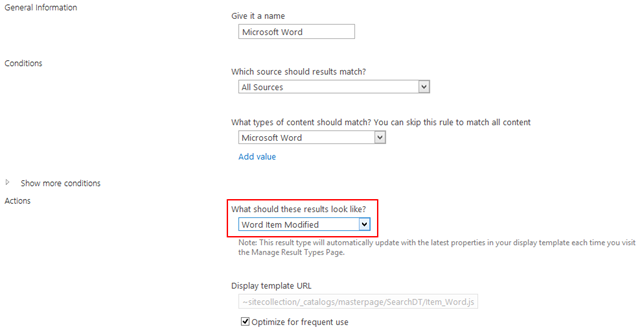
A page will open on which you specify your copy of the result type. What you need to change on this page is the template that needs to be used in Actions dropdown. In my example this needs to be changed from** Word Item** to Word Item Modified (this was the change I made to the title of the item display template).
Once done, you can save your result type. If you go back to your results page, the Word documents results should now have the custom action in place.
Approach evaluation
The advantage of this approach is that you can decide for which hover panels you want to add your custom actions.
The disadvantage of this approach is that you can only add custom actions to a hover panel. You cannot remove or modify the existing ones.
Third approach: adding or modifying a custom action for a specific display template
In the previous approach it was only possible to add a custom action. Now if you want to have more control over the hover panel actions, you can follow this approach in which you will be able to fully customize the hover panel actions like in the first approach, and still be able to specify to which template you want to add it.
The way to achieve it is like in the second approach by making a copy of a specific item and hover panel display template. Like in the previous example, I am going to use the Word display templates:
- _catalogs/masterpage/Display Templates/Search/Item_Word.html
- _catalogs/masterpage/Display Templates/Search/Item_Word_HoverPanel.html Copy them and modify the template title in the Item_Word.html display template and also update the hoverUrl variable to the location of your hover panel display template file copy.
You will also need to create a copy of the hover panel actions display template: _catalogs/masterpage/Display Templates/Search/Item_CommonHoverPanel_Actions.html. Once you made that copy, your modifications can be made to that file.
The registration part is completely different than the first approach. In this approach I only want to ensure that the hover panel actions display template gets used for my specific item display templates. The approach that I am using is the same as how the default display templates internally are getting loaded onto your page. Here is the code that I am using:
<script>Type.registerNamespace('search.hoverpanel');
search.hoverpanel = function () { var loading = false; var hoverpanel = '~sitecollection/_catalogs/masterpage/SearchDT/Item_CommonHoverPanel_Actions.js';
var init = function () { // Check if your hover panel actions display template is already registered and loaded if (typeof Srch.U.getRenderTemplateCollection()[hoverpanel.toLowerCase()] === "undefined" && !loading) { loading = true;
// Load the custom hover panel actions display template var scripts = new Array(); Srch.U.appendScriptsToLoad(scripts, hoverpanel); Srch.U.loadScripts(scripts, function () { // Once the display template is loaded, register this as a template that can be used Srch.U.registerLoadedScripts(scripts); }, function () { // Do something if it failed }); } }, get = function () { // Return the custom hover panel display template function if it exists if (typeof Srch.U.getRenderTemplateCollection()[hoverpanel.toLowerCase()] !== "undefined") { return Srch.U.getRenderTemplateCollection()[hoverpanel.toLowerCase()]; } return; };
return { init: init, get: get };}();</script>This code needs to be added to your item display template inside a script block.
The code contains two functions: init and get. The init function will be used in the item display template, in order to make sure that your custom hover panel display template gets loaded. The get function will be used in the hover panel display template to retrieve the function to render the hover panel actions.
The init function can be called like this in the item display template:
search.hoverpanel.init();Once that is in place, you can open the hover panel display template and at the bottom you should find the following HTML markup:
<div id="_#= $htmlEncode(id + HP.ids.actions) =#_" class="ms-srch-hover-actions"> _#= ctx.RenderFooter(ctx) =#_</div>This needs to be changed to the following:
<!--#_var renderFooter = search.hoverpanel.get();_#--><div id="_#= $htmlEncode(id + HP.ids.actions) =#_" class="ms-srch-hover-actions"> _#= renderFooter(ctx) =#_</div>On the second line you are retrieving the display template function from your hover panel actions template (this is needed because the functions in the JavaScript version of the display templates are automatically generated and contain a guid).
To allow that your templates are used in the search center, you need to create a copy of the result type of which you made these display templates. These steps are described in the second approach.
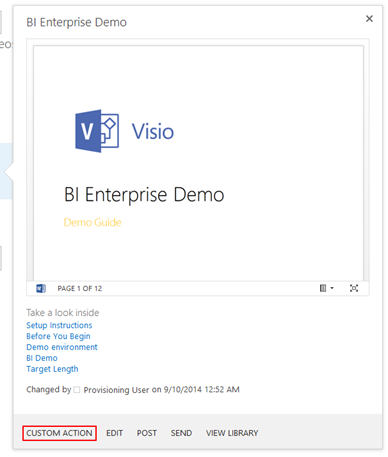
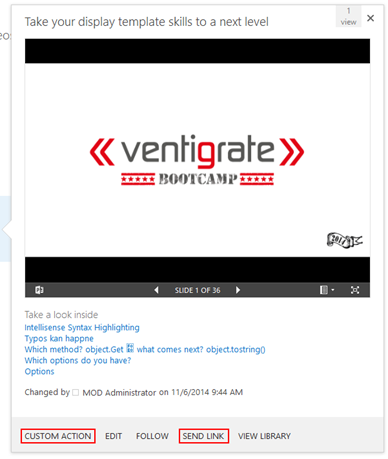
If you do a new search, you should see your added or modified actions in the hover panel.
In my example I added a custom action and updated the send action text.
Approach evaluation
The advantage of this approach is that you are in control to make changes to specific hover panel actions.
The only disadvantage of this approach is that it is optimized for one specific display template. So if you want that your hover panel actions template is used for various result types, this approach needs to be optimized.
Fourth approach: optimizing the third approach for multiple result types
If you want that your hover panel actions display template is used for various result types you need to do some changes to the previous approach.
The JavaScript code that was added in the script block needs to be moved to an external JavaScript file, and gets replaced by a reference to that file:
<script> $includeScript(this.url, "~sitecollection/_catalogs/masterpage/SearchDT/search_hoverpanel.js");</script>The call to the init function needs to be changed to this:
search.hoverpanel.init();The call to the get function needs to be changed to this:
<!--#_var renderFooter = search.hoverpanel.get();_#--><div id="_#= $htmlEncode(id + HP.ids.actions) =#_" class="ms-srch-hover-actions"> _#= renderFooter(ctx) =#_</div>Once these things have been changed, you should get the same output as from the previous approach. If you want to add these actions to other hover panel templates, the following three actions need to be made:
- Add the script reference in the item display template;
- Init function call in the item display template;
- Retrieve the footer function and update the initial render footer call in the hover panel display template.
Here is an example of how it looks like when added to the PowerPoint display templates:
Wrap-up
I show you various ways of how you could achieve it to add or update hover panel actions. Of course everyone has its own ways to get the job done. I like these approaches because they make use a display template, which makes it easy to do modifications to a template.
Other ways to achieve it could be:
- Creating the actions in a JavaScript file instead of a display template. The reason I did not explain this approach is because writing HTML is much easier in a display template;
- Using the first approach, but adding a couple of checks to the template in order to determine when an action should be visualized.
Download
All the templates that have been created for this post can be downloaded from the SPCSR GitHub repository: Hover Panel Actions Display Templates.
Related articles
Creating Custom Refiner Control Display Templates for SharePoint 2013
Part 1: Create Your First Search Refiner Control Template
Part 2: Adding Refinement Actions to the Custom Search Refiner Control
Report issues or make changes on GitHub
Found a typo or issue in this article? Visit the GitHub repository to make changes or submit a bug report.
Comments

Let's build together
Manage content in VS Code
Present from VS Code
Engage with your audience throughout the event lifecycle