Setting up Puppeteer to run on Azure DevOps for your automated UI tests
This post is over a year old, some of this information may be out of date.
A few weeks ago, I wrote about how you can use Puppeteer in combination with Jest to perform automated UI tests for your SharePoint solutions. In that article, you still had to run your tests manually start the tests. In this article, I will explain how you can automate this in Azure DevOps so that it can run on a schedule. With this automated pipeline in place, it makes it relatively easy to validate your solutions after new releases to your environment(s).
Related article: Testing the UI of your SPFx solution with Puppeteer and Jest
The project
For the project base, we use the one that was created for the previous article: https://github.com/estruyf/spfx-ui-tests-sample.
Changes required to run on Azure DevOps
In order to run on Azure DevOps, we need to install the jest-junit dependency to get test reports which Azure DevOps can process. You can install this to the project as follows: npm i jest-junit -S -E.
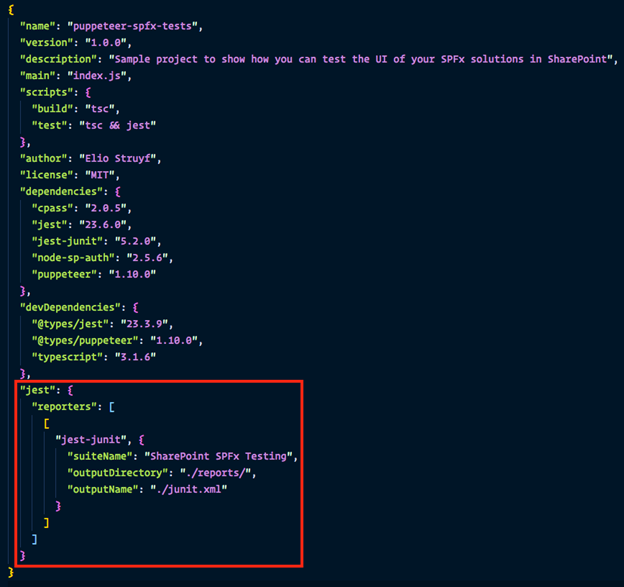
Once this is installed, the dependency needs to be configured. You can do this by adding the following jest object to the package.json file:
"jest": { "reporters": [ [ "jest-junit", { "suiteName": "SharePoint SPFx Testing", "outputDirectory": "./reports/", "outputName": "./junit.xml" } ] ]}Here you can see where you should add it:
If you want, you can already test out the outcome by running: npm test. If you tested it, it should have created a new folder reports and a junit.xml file. This is what is required for Azure DevOps to process the test results.
Code updates
The code used from the repository is using a config.json file for passing the user, password, URL. We will change this to environment variables so that you can easily configure it in the build pipeline.
In the ./src/tests/spfx.spec.ts file, you can remove lines 8-10. On line 16, you can replace the config with the following:
const { USERNAME: username, PASSWORD: password, PAGEURL: pageUrl } = process.env;Update all other references for the username, password, and pageUrl in the code.
You can see all changes in the azure-devops branch of the project: https://github.com/estruyf/spfx-ui-tests-sample/tree/azure-devops.
Ready to run it on Azure DevOps
Once you implemented these changes, create a new repository in one of your Azure DevOps projects, and push the code.
Configuring the tasks
Once the repository is created, you can create a new build pipeline with the following tasks:
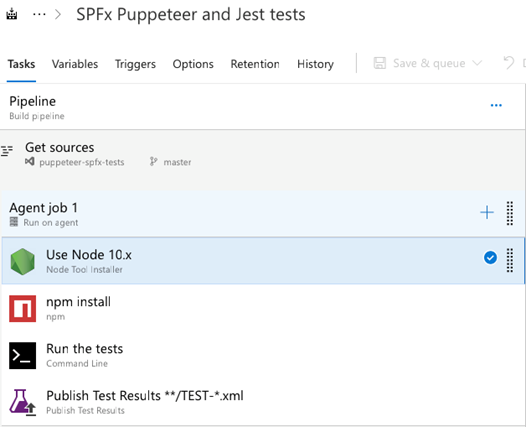
As the agent, I use the hosted macOS, and the tasks should be configured as follows:
Node Tool Installer
I always update my Node.js version to speed up the process. For this one, I used version 10.x.
npm
Use the npm task to run an npm install.
Command Line
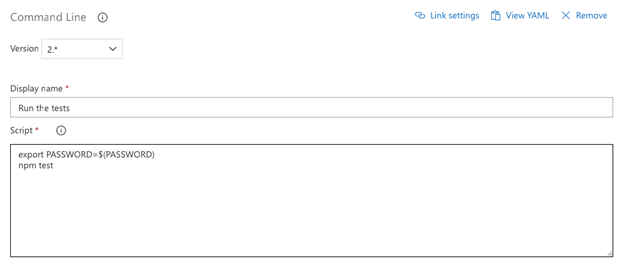
We will use this task to run the tests, but also to set the password as an environment variable because this cannot be retrieved otherwise.
export PASSWORD=$(PASSWORD)npm testHere is how I configured it:
Publish Test Results
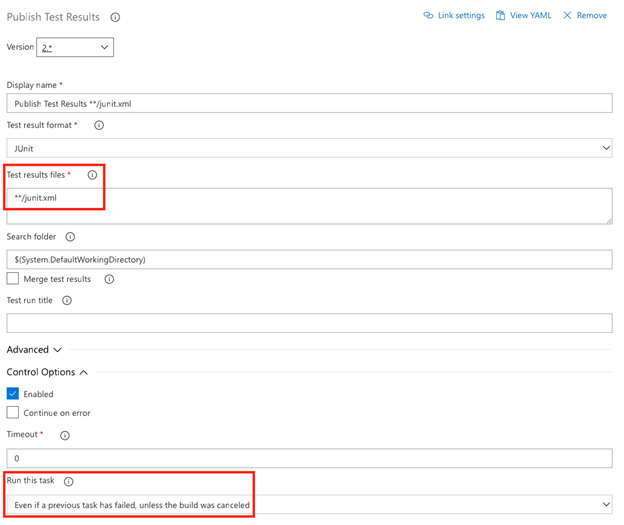
The last step is to publish the test results. Configure it to search for the junit.xml file and to run even if the previous task has failed. That way you will always get to see the testing results.
Specifying the variables
The last thing before you can run it is to specify the pipeline variables, you will have to create the username, **password **(choose to lock this one, so nobody can see it), and **pageurl **variables.
Ready to do some automated tests
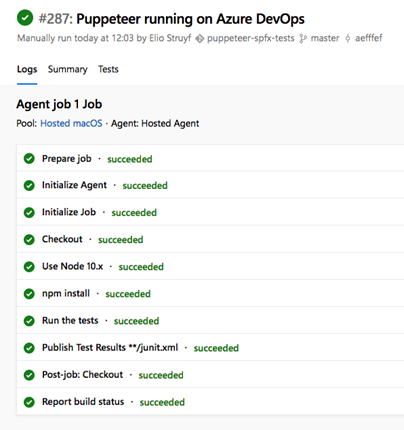
Once you configured all these things, you are ready to give it a first spin. Queue a new build and wait for the outcome.
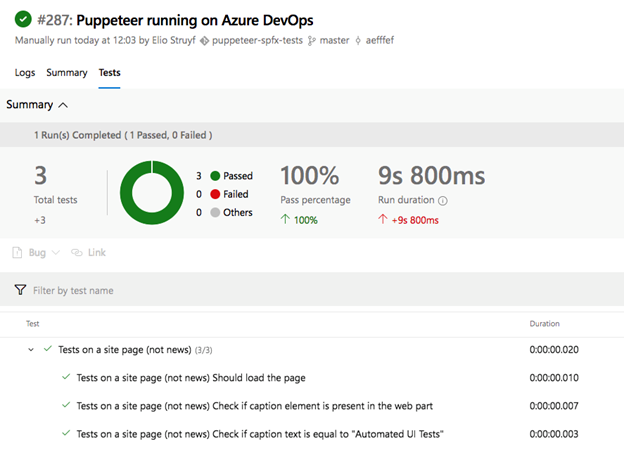
When clicking on the tests tab, you can see a test outcome:
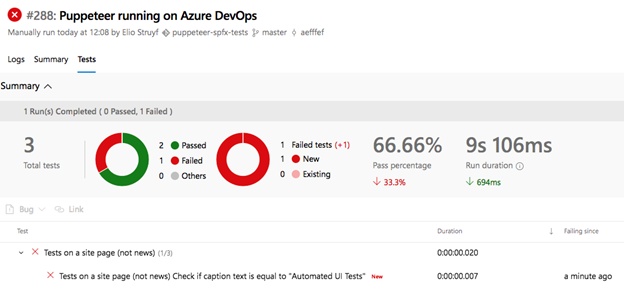
In case of a failed test, you see this:
Next steps are to configure the pipeline to run on a specific trigger or schedule. This is something you can implement underneath the triggers tab.
Enjoy the automated UI tests!
Related articles
Testing the UI of your SPFx solution with Puppeteer and Jest
How to debug your SharePoint Framework web part
Search web part created with the SharePoint Framework
Report issues or make changes on GitHub
Found a typo or issue in this article? Visit the GitHub repository to make changes or submit a bug report.
Comments

Let's build together
Manage content in VS Code
Present from VS Code
Engage with your audience throughout the event lifecycle