Why GitHub Copilot CLI is my new go-to for heavy lifting
As developers, we are always trying to find the most efficient way to build ship, and debug our code. Recently, I’ve been doing a lot of work in a gigantic monorepo for a customer—think 75+ sub-projects bundled into one repository. With such a massive codebase, I found myself hitting performance issues when using the GitHub Copilot Chat extension in Visual Studio Code. One of the main reasons is that Visual Studio Code extensions share the same resources, so when you are making a lot of changes and the Git integration is busy processing them, it ends up competing for the same resources Copilot Chat needs as well. If you want to do some manual changes at the same time, and require formatting updates on save, it can lead to a very laggy experience.
Due to these performance issues, I decided to start exploring the GitHub Copilot CLI, which runs in a completely separate process and doesn’t rely on Visual Studio Code’s resources. In this post, I’ll share my experience with the Copilot CLI and how it has become my new go-to for heavy lifting in large codebases.
The challenge with gigantic monorepos
When you ask Copilot Chat to execute complex, multi-file changes in a massive monorepo, it uses your Visual Studio Code instance’s resources. In my experience with this specific customer project, asking for a substantial change would cause my Visual Studio Code instance to freeze and stop responding.
It takes ages before changes are applied, and you are left staring at a lagging editor. One workaround I found was to disable the Git integration in Visual Studio Code, but that is hardly a sustainable solution as that breaks the GitHub Copilot Chat’s ability to implemnent changes.
I needed a way to leverage the power of Copilot’s agents without sacrificing my IDE’s performance.
The workflow shift: running outside the IDE
The biggest advantage of the Copilot CLI is that it runs on a completely different instance and thread. It doesn’t use Visual Studio Code’s resources to do the heavy lifting.
Initially, I hesitated to move to the CLI because I didn’t want to lose the context-awareness of the Chat interface. I loved being able to point to a specific file or code block. However, the CLI now features a brilliant integration with Visual Studio Code. If you have a Visual Studio Code instance open, the CLI can automatically connect to it and leverage the same context-awareness as the Chat extension.
Here is how my workflow looks in practice:
- I open my project in Visual Studio Code.
- I open Ghostty (my terminal of choice) in a separate window.
- I run the
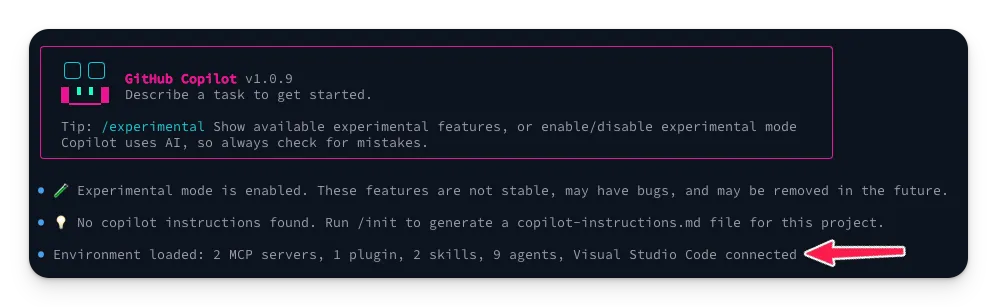
copilotcommand. - The CLI automatically connects to my active Visual Studio Code instance, and I can start prompting.
Bridging the gap: context in the CLI
You might be wondering: “If you are in a separate terminal, how do you pass context to the AI?”
The CLI-to-VSCode integration handles this beautifully. Once your CLI session is connected to your editor, you have two great options:
- You can naturally use
@mentions in the CLI prompt to reference specific files. - You can right-click directly in your Visual Studio Code editor and select Add file/selection to Copilot CLI from the context menu.
You get the performance of a standalone CLI process with the exact same UX conveniences of the Chat extension.
Why the CLI is a game-changer for autonomous tasks
Besides the massive performance boost, the CLI has fundamentally changed how I approach larger tasks.
Zero GUI friction
With the Chat interface, you are constantly managing the GUI. You have to click “Keep” or “Undo” for every projected change. The CLI excels at autonomous task completion. It just does the work. You don’t suffer from GUI overhead; you simply review the resulting changes in your Git diffs later, which is how we naturally review code anyway.
Running parallel tasks with fleet
This is perhaps the coolest feature of the CLI. In Copilot Chat, if you want multiple things done simultaneously, you have to open multiple chat sessions and prompt each one individually.
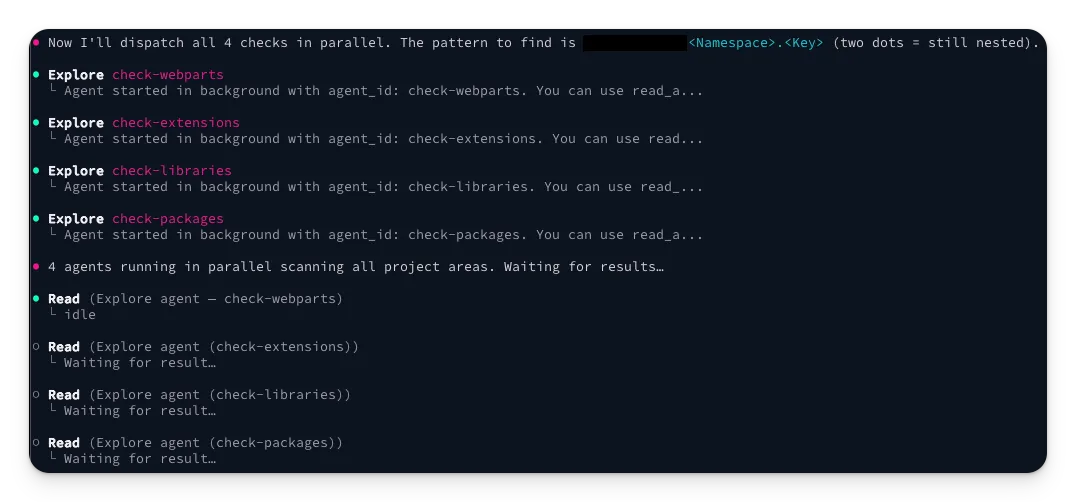
The Copilot CLI introduces the /fleet command, which allows you to pass a single prompt that the CLI splits into multiple actions, working on them in parallel.
For example, I can run:
/fleet check all my projects to update the labels to the new flat structureThe CLI orchestrates the tasks concurrently, saving an immense amount of time. You can read more about this in the official Copilot CLI fleet documentation.
When I still use Copilot Chat
I haven’t abandoned Chat entirely. It still has its place.
If I simply need to implement a quick single-file utility function, or if I need the AI to quickly explain a block of code I’m looking at, the inline Chat is still my go-to. It is perfect for small tasks, but for everything else like heavy agent usage, repo-wide refactors, or anytime I’m working in my massive monorepos, the CLI is the only way to go.
Let me know what you think when you try it out!
Resources
- GitHub Copilot
- Visual Studio Code
- Ghostty Terminal
- Copilot CLI Fleet Documentation
- GitHub Copilot CLI for Beginners (GitHub Repo)
Related articles
Useful Visual Studio Code settings for better coding demos
Enhance your coding demos with these Visual Studio Code settings for better visibility and focus during presentations.
From idea to production in under an hour with AI
How I used GitHub Copilot and AI-powered development tools to build a complete VS Code extension stats dashboard from scratch in record time.
VS Code Workspaces for better AI assistant context
Enhance your AI coding assistant's context with VS Code Workspaces for seamless multi-project collaboration and improved code coherence.
Report issues or make changes on GitHub
Found a typo or issue in this article? Visit the GitHub repository to make changes or submit a bug report.
Comments

Let's build together
Manage content in VS Code
Present from VS Code
Engage with your audience throughout the event lifecycle