Stream Deck review for people who do not play games or stream and use macOS
This post is over a year old, some of this information may be out of date.
During the Corona crisis, most of us had to work from home. One of the devices I saw people making a lot of fuss about was the Elgato Stream Deck. As the name suggests, it intends to make streaming easier to give you a set of buttons you can use for quickly triggering actions.
These actions can be different things like switching scenes, cameras, hotkeys/shortcuts, and many more.

Before I bought it, I read and saw a couple of reviews. As I am not a gamer/streamer, I wanted to make sure it would be a useful device to put on my desk. Many of these reviews focus on the device its primary intention and are maybe a bit too positive. That is why I wanted to make a review myself from a none streaming background and using it on macOS.
The good
One of the best things is the device its customizability. You can specify what each of these buttons is doing via the Stream Deck application.
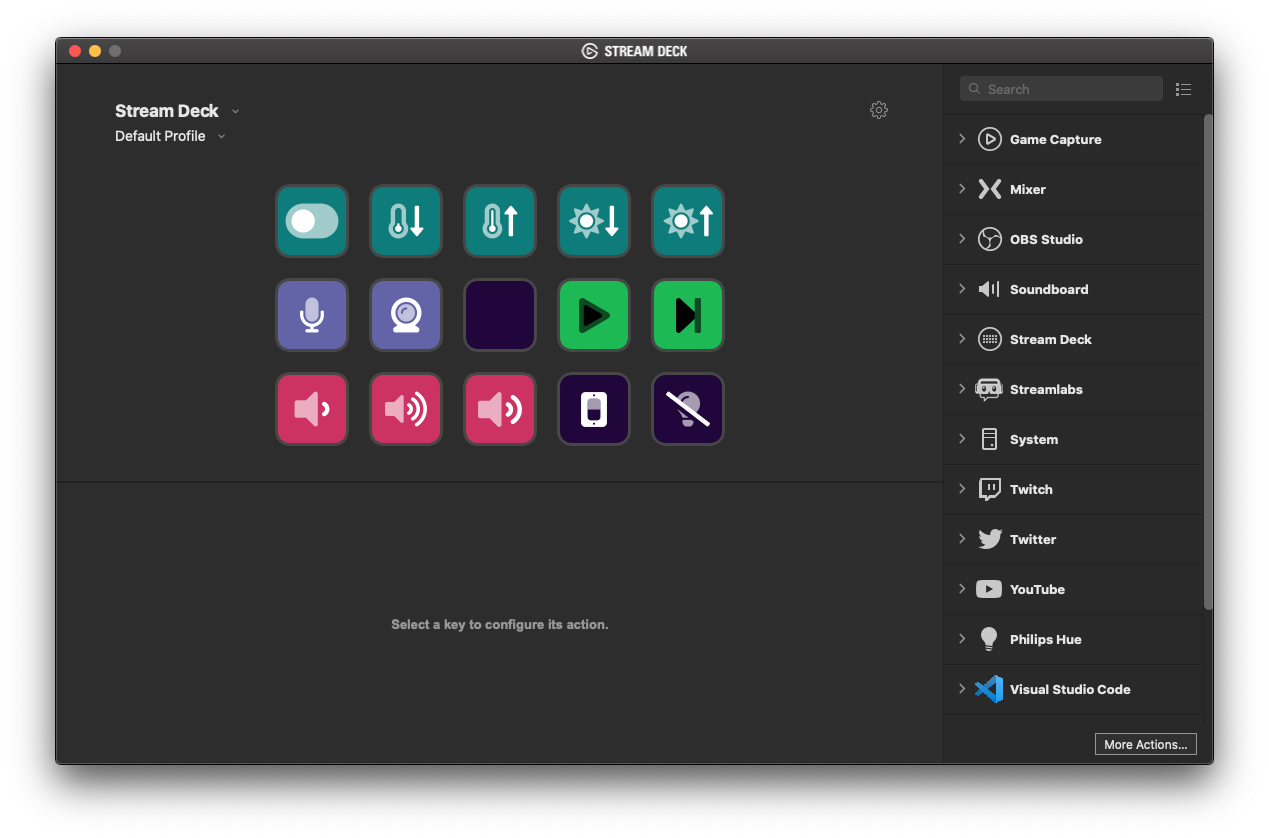
The application allows other products/applications to integrate their actions, such as OBS Studio and many others.
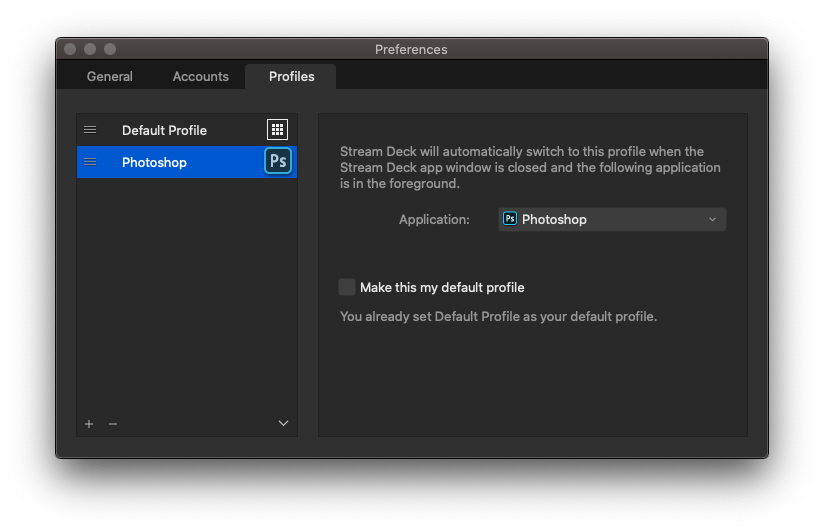
Another great functionality is the ability to create profiles. You can use these profiles for specific applications. For instance, for Photoshop, automatically show all your Photoshop shortcuts.
The bad
Some good things also come with the bad side. I wanted to use the Stream Deck with a couple of actions I saw that were possible. Like playing/pausing Spotify, muting my micro, enabling/disabling my camera. When I started the installation and configuration, I noticed these actions for Spotify, for instance, were not available. Most of all, the external integrations are created for Windows. That, for me, is one of the most significant downsides.
Something else that bothered me has nothing to do with the device and functionality itself. As I am always working from home (not because of the Corona crisis), I wanted to take control of my meetings so that I can easily change my volume, toggle the microphone mute and toggle the camera. Although this might sound like simple actions, none of them were there are fit my needs.
For instance, you have multimedia actions, but these toggle play/pause of the currently active window if something is playing in it. If not, it will toggle it on what is playing on the background. This functionality is a bit frustrating, for instance, when listening to music, and going to Youtube with your browser. When you click on the play/pause action, it stops Youtube instead of stopping the music.
My camera and microphone were only configurable if I used OBS studio. It seems that there is no internal action to enable/disable that from Stream Deck.
The ugly
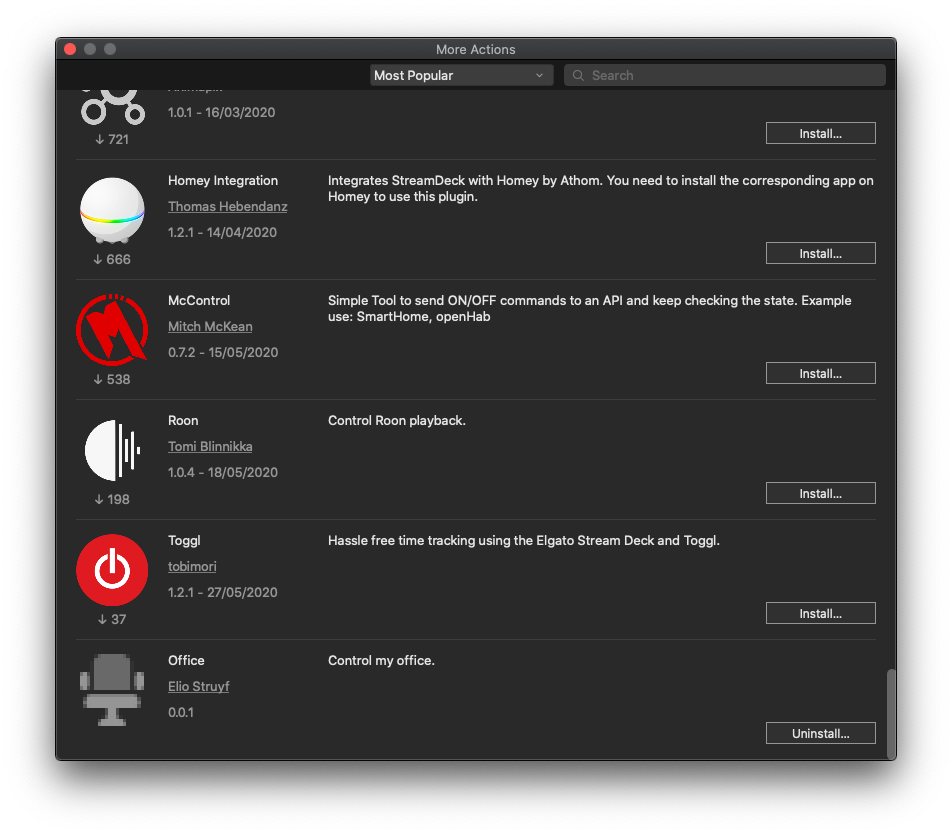
As I wanted to make the device as useful as possible to fit my needs, I thought to start creating my plugin.
Info: You can find documentation for creating your own plugin here: https://developer.elgato.com/documentation/stream-deck/sdk/create-your-own-plugin/.
At first, I was not impressed at all with the development guidance. To create your plugin, you need to start from an existing plugin. It would be better to have a template/blueprint of an empty plugin to start.
Another issue I had was that if you choose to create a JavaScript plugin, it will only be browser-based. Which means you cannot use any Node.js scripts/functionality. This limitation is cumbersome, as this way limits the functionality to, for instance, toggle my microphone, camera, and so on.
Something else that bothered me was the integration with the Elgato Key Lights. If you own Key Lights (which are great by the way), to control them via your Stream Deck, you need both the Control Center application and the actions installed. The control center application needs to be running, as well. Otherwise, you cannot control your lights. As I own two lights, they both need to be set to the same setting, changing brightness/temperature. Luckily Elgato thought about this, and there is a synchronize setting. If you do something to one light, it will also get set to the other, but for some reason, this not always worked as expected.
As I wanted to check what was going on, I started checking the API calls the Control Center application performed.
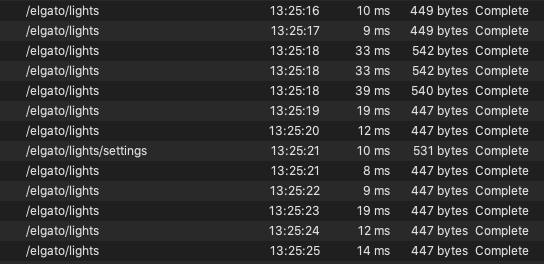
That is when I saw the application was calling each light its API every 10ms. At that point, I decided to write a plugin myself, which does what I want it to do and not have to run additional applications.
Configuring it to my needs
I wanted to have the following actions:
- Control my key lights
- Turning the temperature of the key lights up and down
- Turning the brightness of the key lights up and down
- Controlling Spotify
- Volume controls
- Microsoft Teams microphone and camera controls
- Other light controls in my office
I choose to create all of these actions within a self-created plugin, but this meant I had to come up with a way around the limitation of running Node.js tasks.
Running Node.js tasks from your Stream Deck plugin
I came up with an API to my Spotify Tray Player. This player is an Electron app that I use daily.
This API doesn’t necessarily need to run in an electron app. It can also just be a service.
I am not going into details how this I developed this, as it is a bit too specific, and might not work on another device/environment. Instead, I will highlight what each button does and give you some code samples.
What does each button do
In this section, I will go over each button group and tell more about what and how they work.
Key light controls
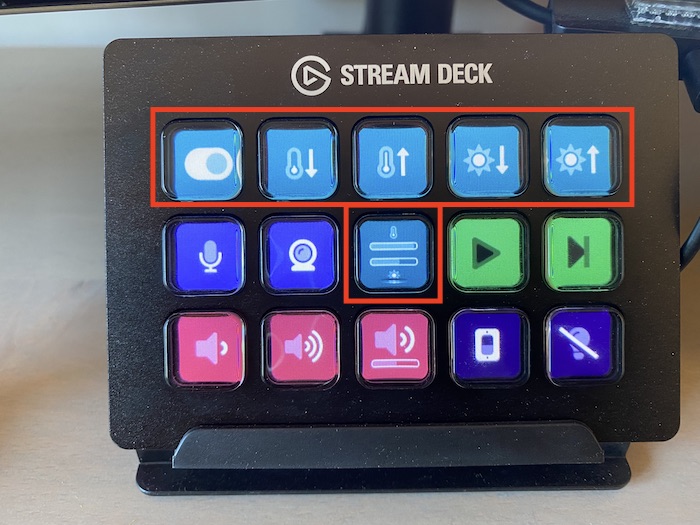
For my Key Lights, I choose to add a toggle button on the left to turn them ON/OFF. The other buttons are there for controlling the light temperature and brightness.
The highlighted button in the middle shows the current temperature and brightness state. That way, I know when I can stop pressing the buttons.
These buttons are controlled by directly calling the Key Lights API. Each Key Light API runs on https://<ip>:9123/elgato/lights.
Once you have your IPs, you can call the API via a GET request to know their current state, and with a PUT request, you can set their brightness, temperature, and ON/OFF state.
{ "lights": [{ "brightness": 50 // 0 - 100 "temperature": 155 // 143 min. - 344 max. "on": 1 // 1 or 0 }]}Here is a movie of how it works:
Spotify
To control Spotify, I choose to make use of the application I already had in place and added some extra API endpoints to control it from Stream Deck.
The application itself makes use of AppleScript to control the Spotify client. That way, you do not need to connect to any API.
Info: If you want to know how this works, please feel free to check out the following solution: Spotify Tray Player.
Volume controls
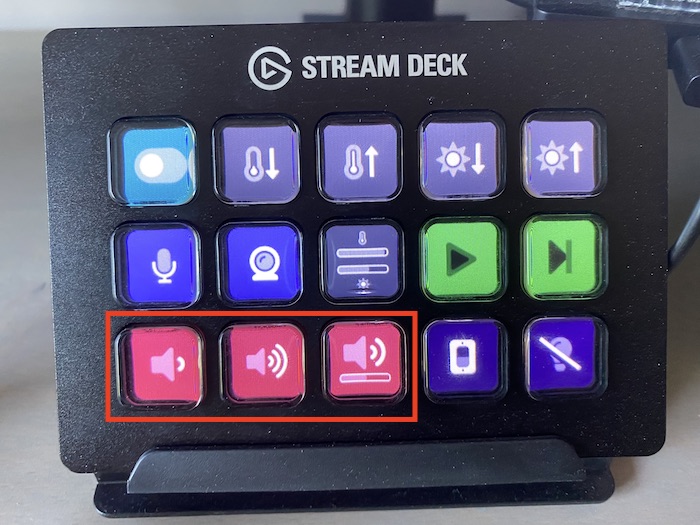
Stream Deck comes with volume controls out of the box. Instead, I still created them myself. The reason is to be able to show the current volume status.
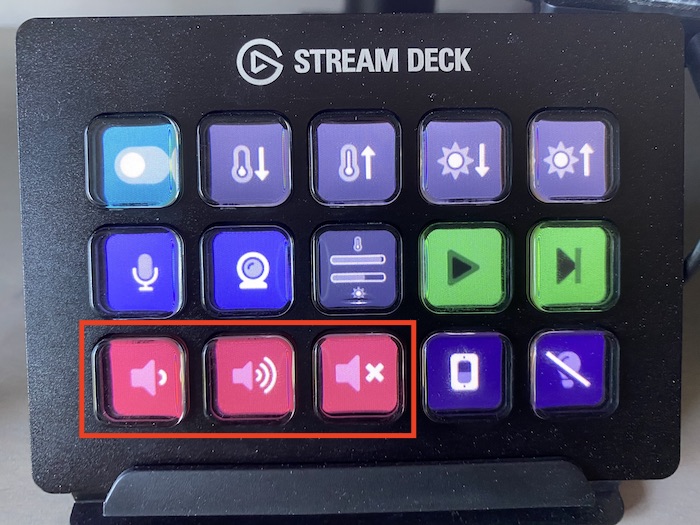
To control these settings, I also make use of AppleScript.
Volume up script:
set volume output volume (output volume of (get volume settings) + 5)
# Outputs the new volume numberoutput volume of (get volume settings)Volume down script:
set volume output volume (output volume of (get volume settings) - 5)
# Outputs the new volume numberoutput volume of (get volume settings)Toggle the volume:
set crntVolume to get volume settingsif output muted of crntVolume is false then set volume with output mutedelse set volume without output mutedend ifHere is a movie how this works:
Other light controls
The other light controls are Philips Hue lights. For this, I use the one and only Philips Hue integration from Stream Deck. These actions work perfectly fine and fit exactly my needs.
Microsoft Teams actions
Last but not least, the Microsoft Teams controls. First, I configured these two controls also via a script. The issue with that is that Microsoft Teams has logic, so you and other participants cannot see when you toggle your camera or microphone.
So I invested some time into finding a solution to make it possible to control Microsoft Teams. Sadly, the only way to control it is via shortcuts.
With the Stream Deck application, you can add hotkey actions.
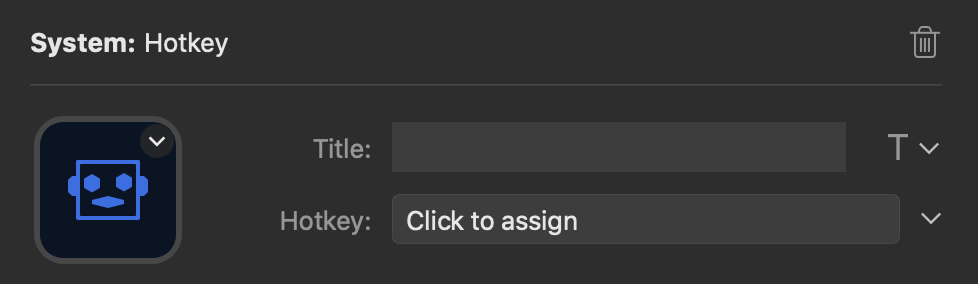
Great, with this, you can configure the hotkeys applicable for your operating system.
Info: Find all keyboard shortcuts for Microsoft Teams here: Microsoft Teams Shortcuts.
But I did not use this. I yet again wrote my implementation. Why? Straightforward answer. When you want to perform a keyboard shortcut, the application needs to be active. If not, you will perform it to the currently active application.
In most cases, you are not having Microsoft Teams active, but running on your second screen instead. That is why I had to come up with yet another way to handle this issue.
The solution was yet again, an AppleScript. The way it would work is first to activate Microsoft Teams and execute the hotkey once active.
Here is the script to toggle your microphone:
tell application "Microsoft Teams" activate tell application "System Events" keystroke "m" using {shift down, command down} end tellend tellHere is the script to toggle your camera:
tell application "Microsoft Teams" activate tell application "System Events" keystroke "o" using {shift down, command down} end tellend tellInfo: To make things easier, I created an npm dependency which you can use in your Node.js API.
Related articles
End-to-End testing your Microsoft Teams solutions with Cypress
#DevHack: Deep linking to Microsoft Teams in Android and iOS
Change the Active Directory User Password Through SharePoint
Report issues or make changes on GitHub
Found a typo or issue in this article? Visit the GitHub repository to make changes or submit a bug report.
Comments

Let's build together
Manage content in VS Code
Present from VS Code