Securing your Azure Functions with an existing Azure AD app
This post is over a year old, some of this information may be out of date.
This article continues the previous article about using the OAuth On-Behalf-Of flow in your Azure Functions. In the last article, the Azure Function only verifies the JWT Token, and if valid, uses it to request an access token and get data on your behalf.
Now you can make your Azure Function or App Services, in general, more secure by adding Azure AD Authentication. This way, users first need to log in before they can use the website or API. The configuration is “pretty easy,” but the experience recently changed a bit. With this change, you could run into some issues. In this article, I want to highlight the steps for secure your existing Azure Function and the things you have to be aware of.
Securing your Functions App
When you open your Function App on the Azure Portal, navigate to Authentication.
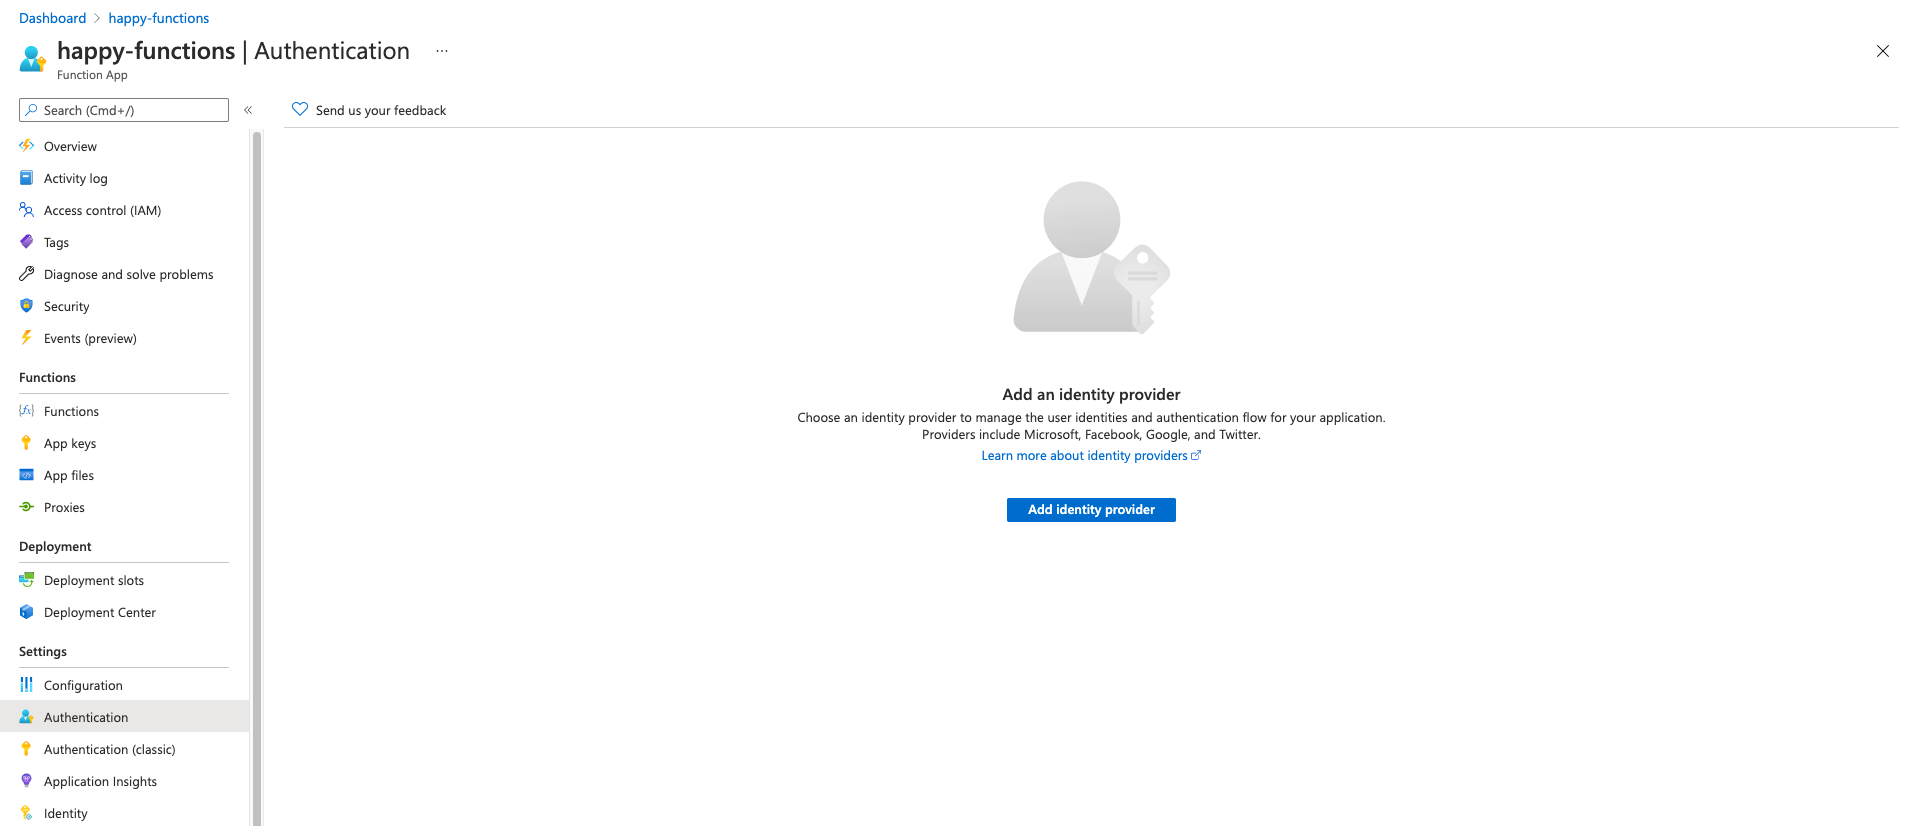
- Click on the add identity provider.
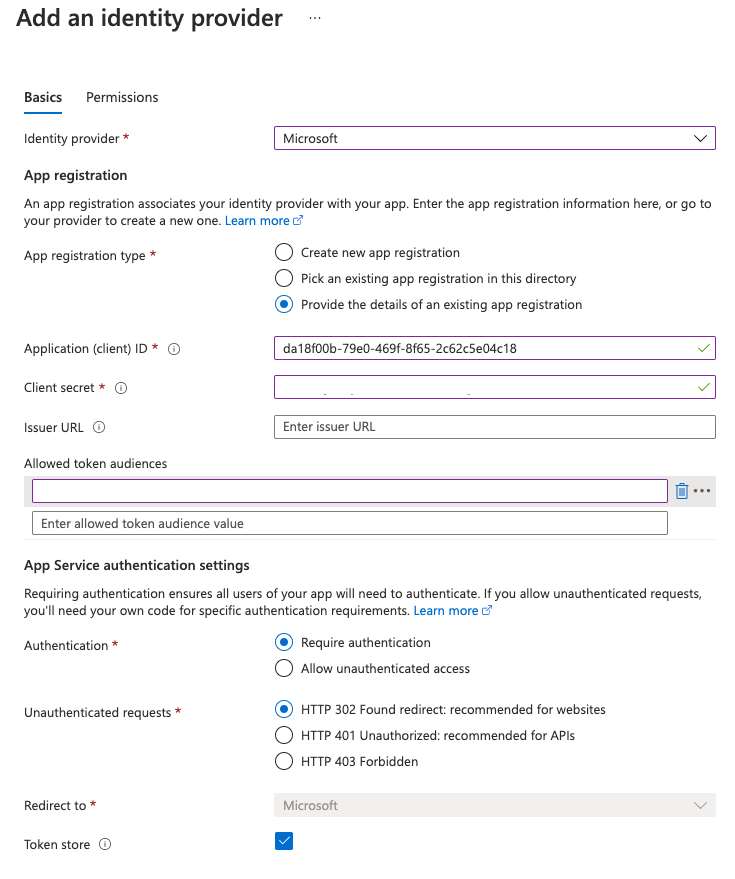
- On the next screen, you can choose between creating a new application or using an existing one. In my case, I will use the Provide the details of an existing app registration. This way, I can use an app registered in another tenant. Not only that, but it will also show you what it uses.
- For the Identity provider pick Microsoft.
- Provide the
client idandclient secretfrom the application registration you created (if you followed the previous article). If you use the Create new app registration, you can continue and skip the next steps. - Leave the issuer URL blank and also the allowed token audiences.
- Click on save.
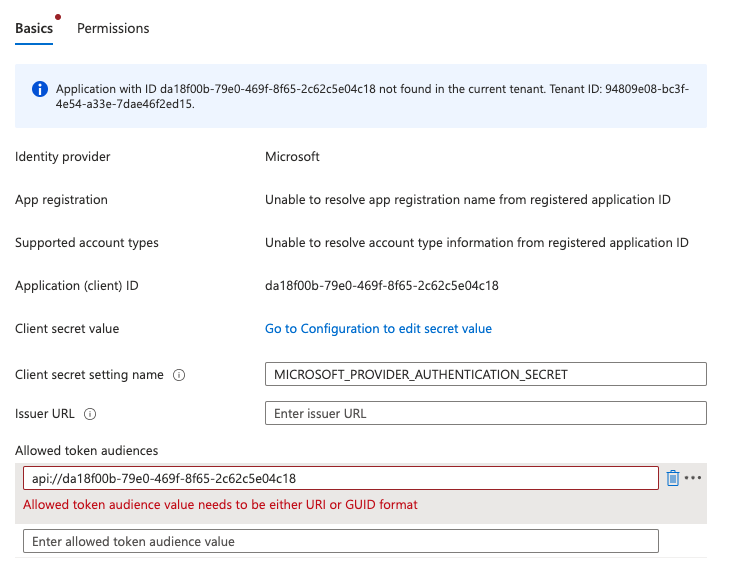
Allowed Token Audiences
In the previous section, I told you to leave the allowed token audiences blank. You should provide a URI or GUID of the application identifier. Now recently, Azure AD automatically gives you the api://<client id> as the identifier. The problem is that this identifier cannot be used for the allowed token audience.
To avoid this issue, you can either specify a URL when setting your Azure AD App - Application ID URI or update the existing one.
If you have an api://<client id> application ID. Open the Azure AD App, and navigate to expose an API. Next to the disabled input field of the application ID, you have an edit button. Click on it and provide a new URI. The Application ID URI must be from a verified domain within your organization’s directory.
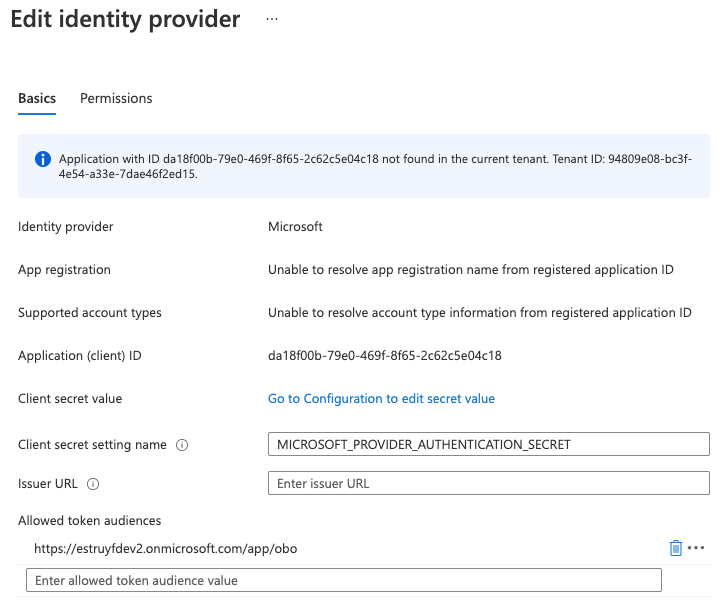
You can verify your custom domain on the branding section under published domain, or you could use the https://<tenant name>.onmicrosoft.com. Make sure to provide a unique URL, for example: https://<tenant name>.onmicrosoft.com/app/obo.
Once you updated this ID, you can add the same ID on the Function App, its identity provider.
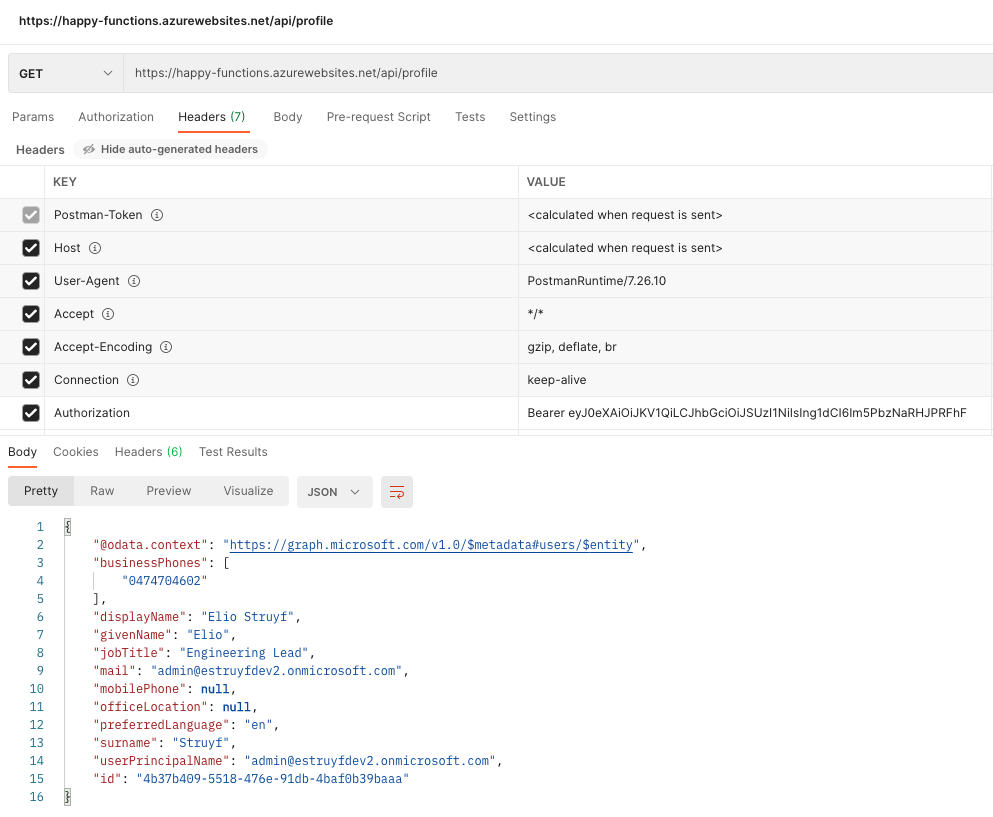
To call the secured Azure Function, you will have to perform the same steps as in the previous article. First, get a token, and pass that in the authorization header to your Azure Function call.
Issues logging in
If you used the previous article’s app registration, you would notice that you cannot log in straight away to your Azure Function. It will tell you it cannot retrieve an ID token.
You can solve this issue by setting the oauth2AllowIdTokenImplicitFlow property in the Azure AD app manifest to true, but that is not the end. When you would try it again, it will tell you the reply URL is not defined.
Go back to your Azure AD app, and on the Authentication section, add the following redirect URL: https://<name>.azurewebsites.net/.auth/login/aad/callback. Once this is in place, the authentication will work.
Related articles
Using OAuth On-Behalf-Of flow in a Node.js Azure Functions
How to use the Microsoft auth provider in Visual Studio Code
In this article, Elio explains how you can use the Microsoft authentication provider in your extensions.
Create an Authentication Provider for Visual Studio Code
In this article, Elio explains how you can build your own authentication provider to be used in a Visual Studio Code extension.
Report issues or make changes on GitHub
Found a typo or issue in this article? Visit the GitHub repository to make changes or submit a bug report.
Comments

Let's build together
Manage content in VS Code
Present from VS Code
Engage with your audience throughout the event lifecycle