Manual GitHub workflow triggers for Azure Static Web Site
This post is over a year old, some of this information may be out of date.
In July 2020, GitHub released a new manual trigger feature for its GitHub Actions workflows. This trigger allows you to run a workflow from the UI, or you can also use it to run it via an HTTP POST request. The HTTP POST request option makes it very useful to trigger your workflow to run from an external system.
Info: Read more about it at GitHub Actions: Manual triggers with workflow_dispatch
Why would you use it with Azure Static Web Sites?
In most cases, you generate all the content of your static website by creating it with some Markdown files. Like for instance, with Gatsby, Hugo, … - All the build process has to do when you push a new article, is build the whole site and put the files in place.
My use case is a bit different. I want to be able to generate the site’s content once I make a change in my CMS (actually my sticker inventory of https://pyod.shop). That way, I do not have to create all the Markdown files by hand. Just have to let a script do the magic for me.
How can you achieve it?
To manually trigger your workflow, you have two types of actions:
workflow_dispatch: allows you to run a specific workflow event.repository_dispatch: will enable you to trigger all workflows on the repository.
In the default static web app setup, you will only have one workflow, so the repository_dispatch event can be used.
Setting things up
Go to your static web app project, and open the <workflow>.yml file. On the top, you will find an on section. This section defines how the workflow can start-up. Here you can add the repository_dispatch trigger.
on: push: branches: - master pull_request: types: [opened, synchronize, reopened, closed] branches: - master repository_dispatch:If you want, you can also specify types of events for the repository_dispatch event:
on: push: branches: - master pull_request: types: [opened, synchronize, reopened, closed] branches: - master repository_dispatch: types: [backend_automation]This change will now allow the workflow to be able to be started from an HTTP trigger. In case you want to start it from the UI, you will need to configure the workflow_dispatch event.
on: push: branches: - master pull_request: types: [opened, synchronize, reopened, closed] branches: - master workflow_dispatch:Another change you have to do to the workflow file is the build_and_deploy_job condition on which it should start. By default, this is only on a push and pull request event and will not yet begin when you do a manual trigger.
To change this, change the if condition to the following:
jobs: build_and_deploy_job: if: github.event_name == 'push' || (github.event_name == 'pull_request' && github.event.action != 'closed') || github.event_name == 'repository_dispatch' || github.event_name == 'workflow_dispatch'Info: I have added both the
repository_dispatchandworkflow_dispatchevents to the condition. Feel free to change it to what you will be using.
For manually triggering the workflow from the GitHub UI, you are all done. When you want to do the trigger from an HTTP request, you will have to set up a personal access token.
Calling the HTTP end-point to start your workflow
To start the workflow from an HTTP POST trigger, you must authenticate using an access token with the repo scope. To set up a personal access token (PAT) for the authentication, you can follow this creating a personal access token guide.
The scopes you need to set for the PAT are: public_repo and workflow. Once you created the PAT, you can make your HTTP POST requests.
The request for the repository_dispatch job looks as follows:
curl \-X POST \-H "Accept: application/vnd.github.v3+json" \-H "Authorization: token <your-PAT>" \https://api.github.com/repos/:user/:repo/dispatches \-d '{"event_type":"<your-event-type>"}'Info: In the request, you can specify the event type which you configured in your workflow file.
The workflow_dispatch request looks similar, but you need to provide other parameters and the workflow of its ID.
curl \-X POST \-H "Accept: application/vnd.github.v3+json" \-H "Authorization: token <your-PAT>" \https://api.github.com/repos/:user/:repo/actions/workflows/:id/dispatches \-d '{"ref": "refs/heads/master"}'You can find the workflow its ID by making the following request:
# Get the list of workflowscurl \-H "Accept: application/vnd.github.v3+json" \https://api.github.com/repos/:user/:repo/actions/workflows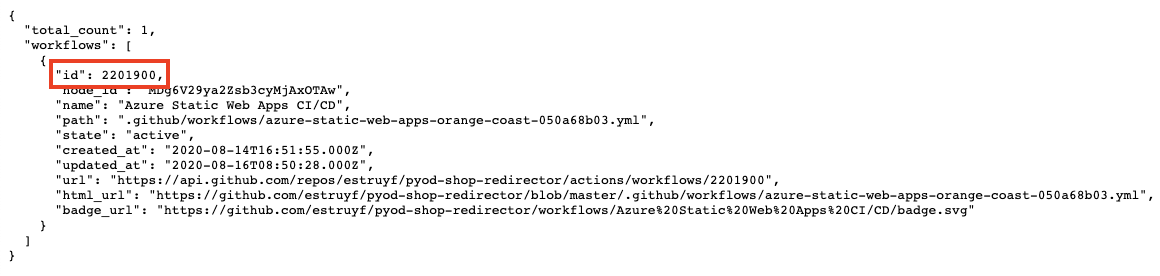
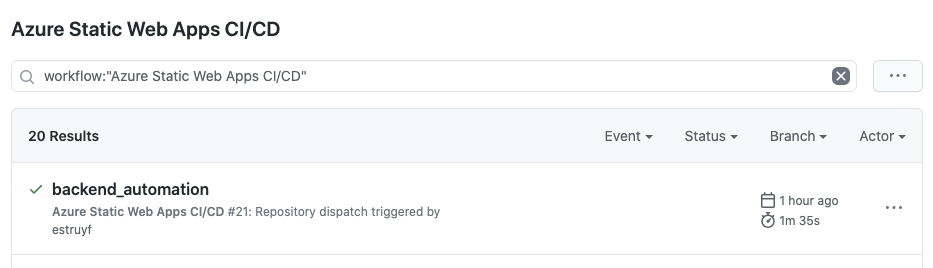
That is all. Now it is up to you how you integrate this HTTP request into your external system.
Related articles
Report issues or make changes on GitHub
Found a typo or issue in this article? Visit the GitHub repository to make changes or submit a bug report.
Comments

Let's build together
Manage content in VS Code
Present from VS Code
Engage with your audience throughout the event lifecycle