Managing my Hugo website with a content and asset submodule
This post is over a year old, some of this information may be out of date.
As a developer, I’ve found that managing my Hugo website’s content with a submodule has been an excellent solution for keeping everything organized and easily accessible. There are several benefits to using a submodule, including the ability to share content with others and reuse it on different sites.
With a content submodule, all of your website’s content and assets are stored in a separate repository on GitHub.
The plan for this was to reuse the content easily with other projects when I was testing out a new static-site generator.
Once I started using it, I thought it would be handy to let others see the raw content and make changes to it. For instance, if you spot a typo, you can make a pull request to the repository. So, in every article, you will find the following section with a link to the raw content:
Getting started
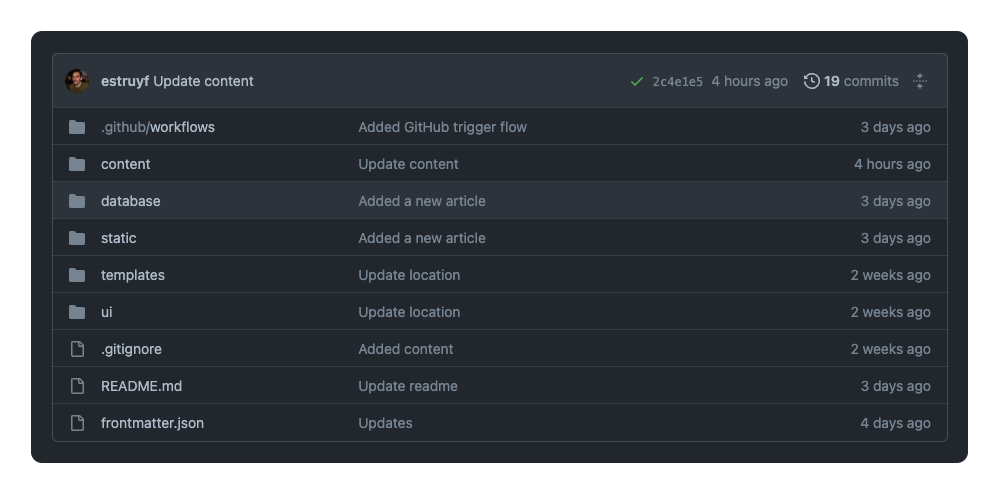
To get started, I created a new repository on GitHub and moved all the content and assets to it. In my case, I also moved my frontmatter.json file and the folders within my .frontmatter folder. That way, I have my Front Matter CMS configuration and the contents in one location.
Once moved, I published all content on the GitHub blog content repository.
Adding the git submodule
Before talking about how to add the repository, let me briefly explain what a git submodule is.
A git submodule is a git repository that is nested in another git repository. It is, for instance, also used to split up monorepos for performance reasons.
To get started adding the content as a git submodule, you will have to open your Hugo (or other types of website) project in your terminal and run the following command:
git submodule add -b main <your repository> <submodule_folder>
git config -f .gitmodules submodule.<submodule_folder>.update mergeThis command adds the submodule and tracks its changes to the main branch. If you run: git submodule add without defining the branch argument, it will run in a detached HEAD state where you might lose changes.
When you run in a detached HEAD state, you can run the following commands to configure it correctly:
cd <submodule_folder>git checkout main
cd ..git config -f .gitmodules submodule.<submodule_folder>.branch maingit config -f .gitmodules submodule.<submodule_folder>.update mergeConfiguring Hugo
Previously, I wrote an article on how to symlink your folders for Astro. The good news is that you do not have to do this for Hugo as for Hugo, as it is just a matter of configuring your content and asset folders.
In the config.yml configuration file, all you have to do is add the following:
module: mounts: - source: <submodule_folder>/content target: content - source: <submodule_folder>/static target: staticThis configuration lets Hugo know the location of the content and asset files.
GitHub Actions
Changes in my website workflow
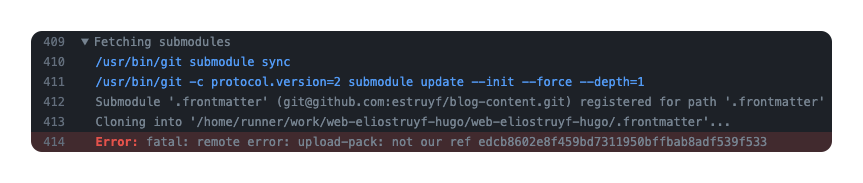
First, I was using the actions/checkout with the submodules: true argument. However, this was not working as expected. It was not fetching the latest changes from the submodule. It was only fetching the commit that was added to the main repository. That led to issues when the submodule was not yet synced.
To make sure to get the latest changes from the submodule, I removed the submodules: true argument and added the following to my website’s workflow:
- name: Checkout submodules main branch run: | git config --global --add url.https://github.com/.insteadOf [email protected]: git submodule update --init --recursive --remoteAs my content is hosted on a public repository, I do not need authentication. That is why I added the first line to rewrite the SSH URL to the HTTPS URL. That way, I can fetch it without needing to provide the SSH key.
The second line is to initiate the submodule and fetch the latest changes.
Workflow on the content repository
Finally, you can set up GitHub Actions to trigger your website to rebuild whenever there are changes to the submodule. This GitHub Action is practical when you only apply a change to the content repository. For instance, when you fix a typo.
Inside the content repository project, I created the following workflow:
name: Trigger blog to build
on: push: branches: - main workflow_dispatch:
jobs: trigger: runs-on: ubuntu-latest steps: - name: Trigger blog build uses: peter-evans/repository-dispatch@v1 with: token: ${{ secrets.REPO_ACCESS_TOKEN }} repository: estruyf/web-eliostruyf-hugo event-type: updateThis workflow triggers a build on the website repository whenever content changes get pushed to the main branch.
Getting the latest changes
One last thing, how do you get the latest changes downloaded locally?
Well, you need to use the following command:
git submodule update --remoteThis command updates the contents of the submodule to the latest commit on the branch specified in the .gitmodules file (in this case, main) and then pulls those changes into your local repository. If the submodule has any new commits since the last time you updated it, those changes will be downloaded and merged into your local copy of the submodule.
Note that if you have made changes to the submodule locally and want to pull in the latest changes from the remote repository, you should first commit and push your local changes before running the git submodule update --remote command. This process ensures that the latest changes from the remote repository do not overwrite your changes.
Pushing the latest changes
As a submodule is “just” another git repository, pushing new changes requires you to run the following commands:
cd <submodule_folder>git checkout maingit add .git commit -a -m "Update to the submodule content"git pushcd ..git add <submodule_folder>git commit -m "Updated submodule"git pushOnce you have pushed the changes to the submodule’s remote repository, you can navigate back to the root directory of your website repository and commit and push the changes made to the submodule reference in your website repository.
One of the nice features of Visual Studio Code is that it notices that you are working with two git repositories instead of writing these commands manually. Visual Studio Code can do it all for you.
Things to do after cloning your repository
When you clone your repository, you will notice that the submodule is not initialized. To initialize the submodule, you need to run the following command:
git submodule update --init --recursive --remote- The
--initflag tells git to initialize the submodule. - The
--recursiveflag tells git to initialize all submodules within the submodule. - The
--remoteflag tells git to fetch the latest commits from the remote repository.
This command fetches the latest commit of the submodule but is not yet checked out to the correct branch. To do that, you need to run the following command:
git submodule foreach git checkout mainFront Matter CMS configuration changes
As I mentioned earlier, I also moved my frontmatter.json file to the content repository. The <submodule_folder> I used is .frontmatter. This way, all of the CMS content is in one place.
To make this work, I had to make a few changes.
Update the page folders and public folder
In my frontmatter.json file, I had to update the frontMatter.content.pageFolders and frontMatter.content.publicFolder settings to include the .frontmatter folder. In my configuration, it looks as follows:
{ "frontMatter.content.pageFolders": [ { "title": "Pages", "path": "[[workspace]]/.frontmatter/content", "excludeSubdir": true }, { "title": "Blog posts", "path": "[[workspace]]/.frontmatter/content/posts" }, { "title": "projects", "path": "[[workspace]]/.frontmatter/content/projects" } ], "frontMatter.content.publicFolder": ".frontmatter/static"}Update the root frontmatter.json file
One more change is needed to make this work. The root frontmatter.json file needs to know that it can use the configuration found in the .frontmatter/frontmatter.json file. To so, you can use the frontMatter.extends setting. In my case, it looks as follows:
{ "frontMatter.extends": [ ".frontmatter/frontmatter.json" ]}That was the last change in order to make it all work. I hope you learned something from this approach and want to try it for your blog/website.
Related articles
The challenges of migrating my Wordpress site to Hugo
Use environment variables in Hugo to show branch information
#DevHack: Installing Hugo on Windows with WSL
Get to know how you can install Hugo io on Windows by using Windows Subsystem for Linux (WSL) in combination with Homebrew.
Report issues or make changes on GitHub
Found a typo or issue in this article? Visit the GitHub repository to make changes or submit a bug report.
Comments

Let's build together
Manage content in VS Code
Present from VS Code
Engage with your audience throughout the event lifecycle