Developing and testing JavaScript / Node.js Azure Functions locally
This post is over a year old, some of this information may be out of date.
Azure functions are available for a while now. Their purpose is to have an event-driven compute without maintaining any server or applications. On my Azure environment, I have various of these small functions running. They all do different things like keeping my Azure search index up to date, sending notifications about my NPM packages, etc. All of my Azure functions are developed for Node.js.
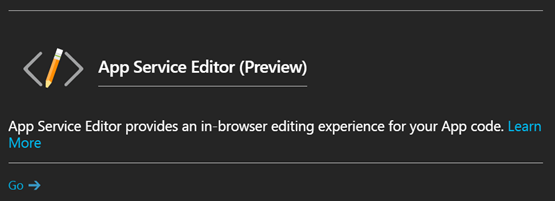
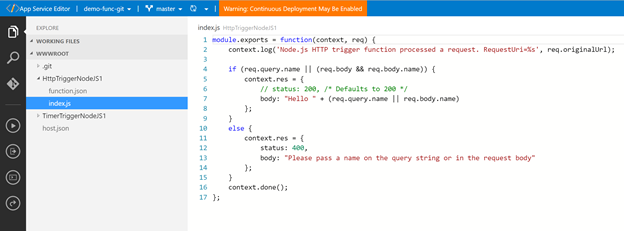
Developing an Azure function has to be done in the Azure Portal itself. There is also anther cool feature which is in preview at the moment called App Service Editor. This is an online code editor that makes the development experience easier because you have a full code editor available and lets you easily switch files.
Info: You can find this option in the App Service Settings:
It is good that you can develop it directly on Azure itself. I like that approach for doing quick and small code changes, but for larger ones, I want to be in control. So I always start my development on my local machine, so that I can easily debug and test them. This not only gives me more control, but it also allows me to write them in TypeScript. Once they are completed, I add the JavaScript code to the function on Azure.
Info: You can do this via a continuous deployment (GIT, TFS, …) or a manual action. The choice is yours to take.
Now to develop them locally, you will have to do a couple of things to make it an enjoyable experience. In this article, I will tell you my approach. Check it out and let me know if this approach works for you.
Approach 1
When you create an Azure function, you always have an export function. This is a requirement for JavaScript function to run. In most cases, this exported function has two parameters:
- Context -> must always be included.
- An object which depends on the type of function you created -> this is optional. Example: req for HTTP triggered functions, myTimer for timer triggered functions, myBlob for blob triggered functions.
Info: more information about JavaScript functions: https://azure.microsoft.com/en-us/documentation/articles/functions-reference-node/
When you want to start developing your function locally. The first thing you might think of is how you get these two parameters because running the function on your local machine would not do anything. As these parameters are only available in the Azure Function context itself. It would require updating your local function code once it is ready to be placed on Azure. These code changes could be changing console.log to context.log and adding the context.done() function calls.
Of course, this does not make the development process pleasant.
The approach I use is by creating mock objects that will only be used when my function runs in development. Here is a code snippet of my mock objects:
The most important one is the debugContext object. This object contains the same functions which can get called from within the original Azure Function context. This way, you do not have to do any code changes before adding it to Azure.
Of course, this approach requires more changes to make it all work. One of the other changes is to create a new function called AzureFunction and add all the logic of the default exported function to it. This makes it easier to call your function when debugging it.
The last thing to add is a check to see on which environment your code is running.
With the above code, I retrieve the APPSETTING_NODE_ENV or NODE_ENV environment setting. When debugging in Visual Studio Code, NODE_ENV will be equal to development. On the Azure Function app service, only the APPSETTING_NODE_ENV is present and it is set to production.
If we combine all these code snippets, you would get this:
As you can see, when running it in a production environment (Azure in this case) it will export the AzureFunction. In development, you will build your mock objects and pass them to the AzureFunction function call. The great thing about this approach is that you only need to change your mock objects during development and once your function is complete you can add it to Azure without any change to the code. As mentioned, this makes it also great for TypeScript development on your local machine.
Here is an example of the debug output:

Here is a direct link to the sample: HttpTriggerNodeJS1.
Approach 2
Another approach is like Waldek (@waldekm) proposed to seperate the mock from the actual code. This approach is also a great way to test your code and does not require a lot of change.
What you have to do is keep all your Azure function logic in the main JS file. So in this example it would look like this:
Besides that main file, you create a local.js file (can also be in TypeScript if you want). In that file, you can add all your developer logic. Here is how this would look like:
So what you do in your local developer file, is first loading the Azure function index.js file via require(‘index’). Once it is loaded, you build the mock objects and pass them to Azure function.
Here is a direct link to the sample: HttpTriggerSeperatedDevJS.
Check out the code
If you are interested in the code, I added the code to a sample Azure functions GitHub repo: Azure Sample Functions.
Related articles
Create an Azure Function to update your Azure Search Index
Have you ever thought about checking your dependency for vulnerabilities?
How to debug your SharePoint Framework web part
Report issues or make changes on GitHub
Found a typo or issue in this article? Visit the GitHub repository to make changes or submit a bug report.
Comments

Let's build together
Manage content in VS Code
Present from VS Code