Automate publishing of your SharePoint Framework scripts to Office 365 public CDN
This post is over a year old, some of this information may be out of date.
Last year Microsoft announce the Office 365 public CDN capability. This is CDN option from Office 365 is a great way for you to host your assets like images or JavaScript files. Most important, this is probably the easiest option for publishing your SharePoint Framework client-side web part assets. This is because it does not require you to setup anything on Azure. The only thing which is required is a document library which you specify in your tenant to be used in the CDN endpoint.
Info: Office 365 CDN announcement - https://dev.office.com/blogs/general-availability-of-office-365-cdn
Important: the Office 365 public CDN capability is still in developer preview.
Currently, the SPFx documentation only explains how to deploy your files to Azure CDN (Azure storage). I am sure the Office 365 CDN will also be covered once it is generally available.
Info: deploy to Azure CDN - https://docs.microsoft.com/en-us/sharepoint/dev/spfx/web-parts/get-started/deploy-web-part-to-cdn
Waldek Mastykarz already wrote a great article about it on his blog. In the article, he explains how you can publish your client-side web parts to this CDN option.
Info: related article - Publish SharePoint Framework client-side web parts to Office 365 public CDN
As SPFx currently only has a built-in publishing mechanism for Azure CDN, it requires some manual action to get your web part assets published every time you do a new production build. Although the action is simple, it just involves that you upload the production bundle script to the SharePoint document library. You might want to automate this process, so that process works a bit smoother.
In the article, Waldek mentioned that you can make use of a gulp plugin called gulp-spsync to automate this task. The gulp-spsync plugin allows you to upload files to a SharePoint document library from running a gulp task. This makes it the ideal plugin for automating the publishing process of your files to the Office 365 CDN.
Gulp plugins
gulp-spsync: this plugin made by Wictor Wilén, makes use of SharePoint add-in permissions (client ID and secret). If you want to make use of this plugin, be sure to follow the configuration steps explained on the GitHub page: https://github.com/wictorwilen/gulp-spsync
gulp-spsync-creds: this is a fork of the gulp-spsync plugin that I created. This version makes use of credentials (username and password) and has some other useful functionality built in. Read more about it on the GitHub repository: https://github.com/estruyf/gulp-spsync-creds
Adding a custom upload to SharePoint task in your SPFx project
When you want to built-in this functionality into your SharePoint Framework project. You must follow the next steps:
- Configure the Office 365 CDN for your Office 365 tenant. Check out the following article on how you can do this: https://dev.office.com/blogs/general-availability-of-office-365-cdn
- Update the write-manifests.json file (which you can find in the config folder) with your cdnBasePath:
https://publiccdn.sharepointonline.com/<tenant host name>/<ID of the public CDN origin>/<sub-path under the origin>/ - Install the gulp plugin in your SharePoint Framework project. You can choose between the gulp-spsync or gulp-spsync-creds plugins. For this article, I used the gulp-spsync-creds plugin which uses a username and password. You can install it by executing the following command:
npm install gulp-spsync-creds --save-dev --save-exact.
Important: another reason I used the gulp-spsync-creds plugin is because it has useful setting built-in which allows you to specify to the library path to where you want to upload your files. That way you do not have to do any changes in the folder structure that SPFx provides you.
I expect the gulp-spsync plugin will support this setting soon, as I did a pull-request to the project. You can check out the changes here: https://github.com/estruyf/gulp-spsync(pull request got merged, so the new version contains this option).
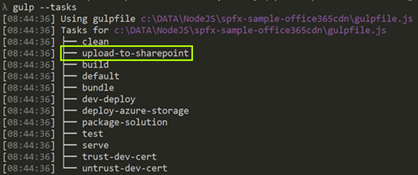
- Open the gulpfile.js file and add the upload to SharePoint task in it:
Default gulpfile.js contents
'use strict';
const gulp = require('gulp');const build = require('@microsoft/sp-build-web');
build.initialize(gulp);Gulpfile.js contents when using the gulp-spsync-creds plugin
'use strict';
const gulp = require('gulp');const build = require('@microsoft/sp-build-web');const spsync = require('gulp-spsync-creds').sync;
build.task('upload-to-sharepoint', { execute: (config) => { return new Promise((resolve, reject) => { const deployFolder = require('./config/copy-assets.json'); const folderLocation = `./${deployFolder.deployCdnPath}/**/*.*`; return gulp.src(folderLocation) .pipe(spsync({ "username": "<username>", "password": "<password>", "site": "https://<tenant>.sharepoint.com/<relative-site-path>", "libraryPath": "<document-library-URL>", "publish": true })) .on('finish', resolve); }); }});
build.initialize(gulp);Gulpfile.js contents when using the gulp-spsync plugin
'use strict';
const gulp = require('gulp');const build = require('@microsoft/sp-build-web');const sp = require('gulp-spsync');
build.task('upload-to-sharepoint', { execute: (config) => { return new Promise((resolve, reject) => { const deployFolder = require('./config/copy-assets.json'); const folderLocation = `./${deployFolder.deployCdnPath}/**/*.*`; return gulp.src(folderLocation) .pipe(sp({ "client_id": "<client-id>", "client_secret": "<client-secret>", "site": "https://<tenant>.sharepoint.com/<relative-site-path>", "libraryPath": "<document-library-URL>", "publish": true })) .on('finish', resolve); }); }});
build.initialize(gulp);Info: you are of course free to give the task another name. Currently the task name is: upload-to-sharepoint.
- Update the username, password, site URL and libraryPath settings.
Info: when you use the gulp-spsync plugin, these settings should be changed to the client ID and secret.
- Run
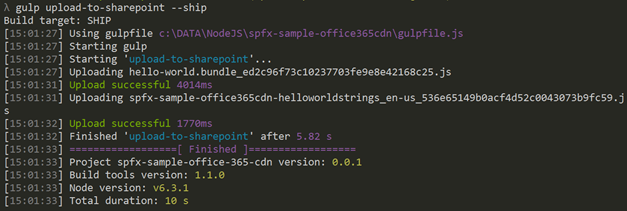
gulp bundle --shipto generate the production scripts. These scripts get created in the ”./temp/deploy” folder. - Once the production bundle scripts have been generated. Run the upload to SharePoint task as follows:
gulp upload-to-sharepoint --ship
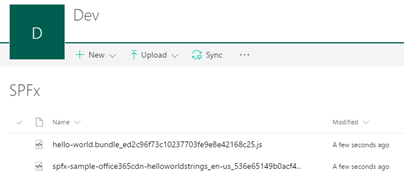
- When the command finishes, you can go check out the document library. The document library should now contain the JavaScript files.
- Run the package solution command to create the app package to deploy it onto your environment:
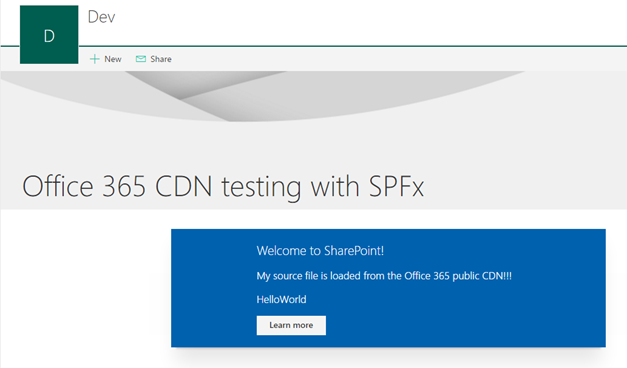
gulp package-solution --ship - Upload the *.spapp package file (underneath the ”./sharepoint/solution” folder) to your catalog and you are good to go to start using your web parts from the Office 365 CDN.

Steps after previous configuration steps
When you went through all the previous configuration steps. Things get much simpler. Whenever you want to publish a new production ready web part, the only steps to execute are: bundle, upload to SharePoint, and package your solution.
gulp bundle --shipgulp upload-to-sharepoint --shipgulp package-solution --ship
What with different environments: test, production?
Currently, the ship flag for the new upload to SharePoint task has no added functionality yet. When you are working with test and production environments, it might be useful to take advantage of this flag to automate the publication of your scripts to either your test or production. In the sample project, you can find an example of how you can achieve this. When you want to do a upload to your test environment, you have to run gulp upload-to-sharepoint. To upload the scripts to your production environment, run: gulp upload-to-sharepoint --ship.
Sample project
Here is a sample project in which the gulpfile.js file has been modified: upload to Office 365 CDN.
Updates
27/02/2017
Updated the Gulp code to support the general availability of SPFx.
21/04/2017
Updated the post with the GA announcement of the Office 365 CDN offering.
Related articles
Report issues or make changes on GitHub
Found a typo or issue in this article? Visit the GitHub repository to make changes or submit a bug report.
Comments

Let's build together
Manage content in VS Code
Present from VS Code
Engage with your audience throughout the event lifecycle