A new way of developing display templates
This post is over a year old, some of this information may be out of date.
Creating display templates for SharePoint is a fairly easy job, but we all have our own ways of developing them. Over the last couple of months, I barely touched managed code. Everything I do these days is mainly achieved by using JavaScript and/or TypeScript in combination with Visual Studio Code. As I really like this new way of working, I started testing how this could ease my display template development process and it turned out to be very useful.
By default, there are a couple of ways. The first one would be the manual way in which you change the display templates on your PC and upload them to the master page gallery. This is a slow process of course if you have to do a lot of changes to your templates. Also, drag and drop does not work in the master page gallery, so you have to click a lot of times for the upload process.
Another way might be to use the mapped drive or open with explorer view functionality. My experience working like this is that connection issues might occur or the explorer view does not want to open and shows the OneDrive sync dialog. These connection issues are mainly related to WebDAV or tokens that expire for Office 365. I also experienced that files get corrupt or that they cannot get saved because they are in a sort of “locked” state. For Mac users, this is not an approach which can be used.
Then you have the Visual Studio way in which you can package all your templates in a sandboxed solution to be deployed to your environment. This is a good solution if are at the end of your development process and want to package all your files, otherwise, this will also slow you down a bit because with every file change you have to redeploy the solution.
Info: someone made me aware that you also have a Chrome plugin which can be used to modify files directly in SharePoint.
I am not going to tell you that there is a “bad” way of working. If you like yours, you do not have to change it. This article is only intended to make you aware of a new way of developing display templates. So try it and feel free to give feedback if your missing something.
A new way of working
If you are following what goes on in the development world, you probably already know that many people make use of Node.js, Gulp, Yeoman, … these days.
Gulp is fantastic for creating tasks which can automate things in your development processes. This could be tasks like minimizing files, compiling TypeScript to JavaScript and more.
Yeoman is a scaffolding tool for building modern web applications. As you may know, this is also the tool that can be used for building new Office add-ins and will also be used to create web parts with the new SharePoint framework.
A couple weeks ago I started testing with Gulp to optimize my display template development process, and I must say that it did (otherwise I would not write this post).
You might ask yourself, why would you use Gulp and where does it fit in the development process?
I am making use of it to automatically upload my files to SharePoint, so that I do not have to map the library as a drive or open in explorer view. For this, I am using a Gulp plugin called: gulp-spsync which has been created by Wictor Wilen. This plugin makes use of the SharePoint add-in model to upload files and can only be used on SharePoint Online.
Important: check the gulp-spsync page to see how the plugin has to be configured.
To support this development approach for on-premises environments, I created a new version of the gulp-spsync plugin which makes use of client credentials to upload files. The plugin is called gulp-spsync-creds and can be found on the following GitHub repo: gulp-spsync-creds.
Here is an example of the Gulp watch function in action:

Of course, this requires some configuration. When you start a new project for a new client, you have to install a couple of dependencies before you can start (or you can copy and paste everything from another project). This is not ideal, so that is where Yeoman comes in the picture.
Making things easier with Yeoman
Yeoman can be used to build your own generator that automatically creates all required files and folders. Last week during the SPC Adriatics conference I created a display template generator and I am happy to announce that this generator is now publicly available via the Yeoman site.
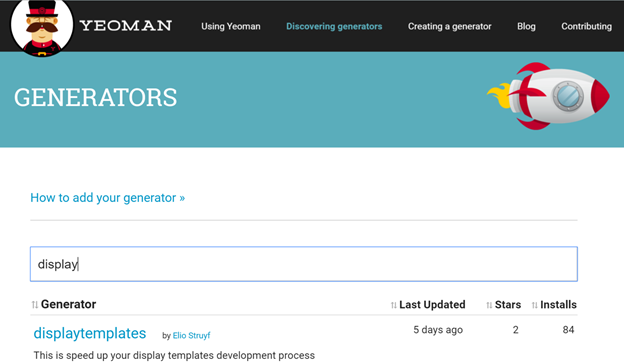
If you want to test out this generator, you can install it with the following command:
$ npm install -g gulp yo generator-displaytemplatesOnce installed, go to a folder in your command prompt and run the next command:
$ yo displaytemplatesThis loads the display template generator and it will ask you a couple of question:
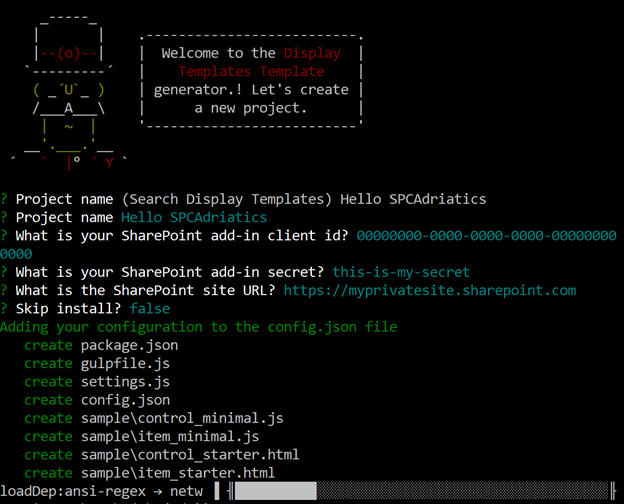
Once you answered all these questions, the files get created and the required npm packages get installed.
Info: for more information, go to: https://github.com/estruyf/generator-displaytemplates
Where to put your files
Once the generator has finished, you will end up with a sample and src folder in your directory in which you ran the command. In the sample folder, you find two HTML display templates (item and control) and two JavaScript display templates (item and control if you only want to work with JavaScript templates). These templates are intended to make it easier to get started. All you have to do is copy and paste one of the files to the: src/_catalogs/masterpage/your-project-name folder.
Info: you can of course also use your own display templates; you do not have to start from these sample templates.
Running your Gulp tasks
Once everything is in place, you can start uploading your files, this can be done either all at once or automatically for every file change. That last one is interesting when you are applying changes to your display templates or creating new ones.
Here are a couple of Gulp tasks that you can use (more information on the GitHub repo):
gulp: this task uploads all the display templates to the masterpage gallery
$ gulp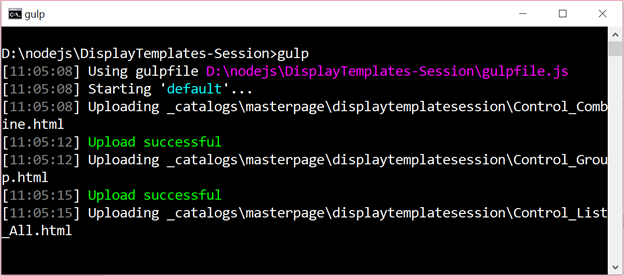
gulp publish: uploads all the files, sets metadata and publishes each of the files.
$ gulp publish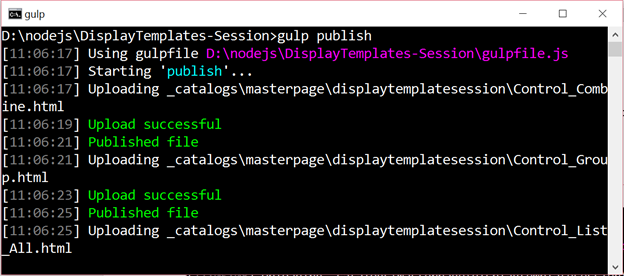
gulp watch: watches for file changes, once a change happens, the file will get uploaded.
$ gulp watch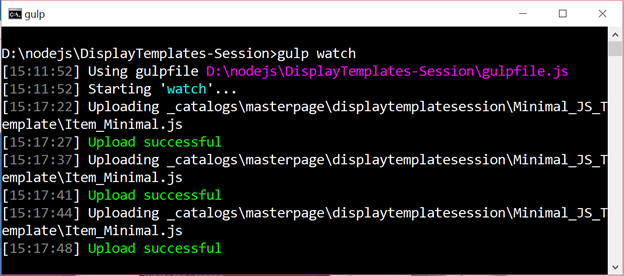
Info: all the information about the Gulp tasks that can be used can be found on the generator’s GitHub repository page: Yeoman display template generator.
More information
The generator is available on NPM via the following link: NPM generator-displaytemplates.
All the documentation about this generator can be found on the GitHub repo: https://github.com/estruyf/generator-displaytemplates.
Related articles
Report issues or make changes on GitHub
Found a typo or issue in this article? Visit the GitHub repository to make changes or submit a bug report.
Comments

Let's build together
Manage content in VS Code
Present from VS Code
Engage with your audience throughout the event lifecycle