AlertThis post is over a year old, some of this information may be out of date.
Order List Items Like in a Meeting Workspace: Part 3
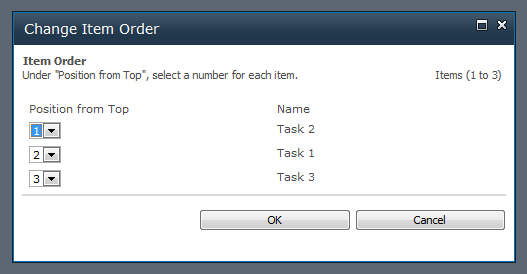
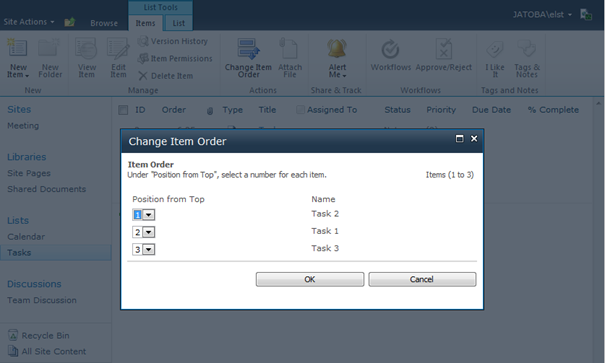
In the previous parts I told you how you could enable the reorder functionality and create a custom reorder action in the ribbon. In this blog post I will cover how you could open the reorder page in a SharePoint dialog window.
Everywhere in SharePoint you got dialog windows. So it would be much cleaner to modify the custom action to also use a dialog box.
You will need to use JavaScript to open a dialog box. This can be done by creating a call a function called showModalDialog. More information about this function can be found here: MSDN.
So what does this function need?
1
SP.UI.ModalDialog.showModalDialog(options)
The option properties you will be using in this example are: url and dialogReturnValueCallback.
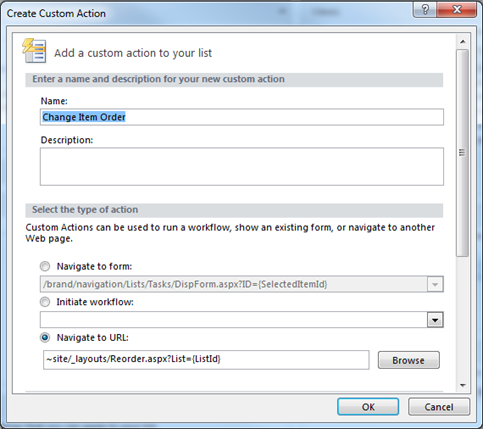
For the url property you could use the Navigate to URL value from the previous post.
1
~site/_layouts/Reorder.aspx?List={ListId}
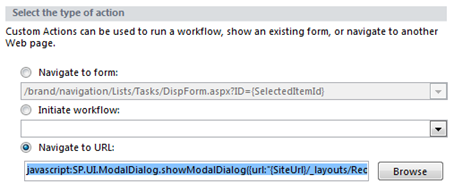
When working with a JavaScript call, the ~site token will not work. This needs to be replace with this: {SiteUrl}.
1
{SiteUrl}/_layouts/Reorder.aspx?List={ListId}
With the dialogReturnValueCallback property you can create a callback function that executes after a completed form submission.
We are going to use this property to create a callback function that automatically refreshes the page when the form submission was ok. You could use the following function.