Recently Microsoft announced the SharePoint framework. This framework makes use of the latest trends in the developer landscape like client-side development and integrating open source frameworks. For many of us, this was great news. The framework will be a great way to build new things for SharePoint.
Of course, the SharePoint framework requires you to learn a couple of development tools with which you might not yet be familiar with.
From another blog post I wrote about the new way of developing display templates, I noticed that some of you are not yet up to speed and/or require some guidance what these new tools are and for what they can be used. That why I thought to start writing a getting up to speed series which will cover topics like Node.js, npm, Gulp, Yeoman, …
In this blog post, I will cover Node.js and npm.
Node.js

Node.js® is a JavaScript runtime built on Chrome’s V8 JavaScript engine. Node.js uses an event-driven, non-blocking I/O model that makes it lightweight and efficient. Node.js’ package ecosystem, npm, is the largest ecosystem of open source libraries in the world.
Node.js allows you to write server-side JavaScript code and is used these days to build client applications, web applications, and more.
Windows installation
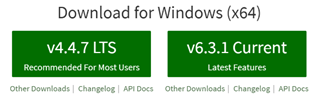
The installation process for Node.js is fairly easy. Go to the https://nodejs.org website and you will find two big green squares. The left one is the LTS or Long Time Support version, currently v4.4.7. Version 6 will become the new active LTS in October this year.
Info: Node v6.0.0 (current)
On my machine, I installed the current LTS version v4.4.7. Once you click on it, the installation file will be downloaded to your machine.
Once the file is downloaded, run the installer.
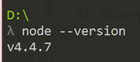
If you completed the installation, you can open a command prompt and run the following command:
| |
Once you ran it, you should get the following output:
Using Node.js
When Node.js is installed on your machine, you can start making use of it. The easiest way test it out is by creating a new folder and navigate through it within a command prompt.
In your folder, create a new JS file “hello.js” and paste the following content in the newly created file:
| |
Run the following command:
| |
Running this command results in the following output:
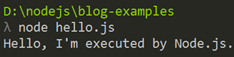
This is a very simple example of just logging something to the command prompt. The next step would be to try and run something in the browser. To do this, create a new file called “web.js” and insert the following contents:
| |
Info: this code is making use of the **HTTP **module with which you are able to create your own HTTP server - https://nodejs.org/api/http.html
The code creates a new HTTP server and initiates it on port 8080. If you run the following command:
| |
You should get the following output:

When you navigate to http://localhost:8080, you should see the following message:
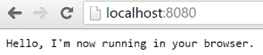
As you see in these simple examples, Node.js can be used in various ways. Node.js can even be used to help you with development tasks like minifying JavaScript, transpiling SASS to CSS, transpiling TypeScript to JavaScript. These so called jobs can be automated via task runners like Gulp or Grunt. More about this in the next blog post.
npm

npm is the package manager for JavaScript
Node.js and npm go hand in hand. Npm is a JavaScript package manager which is used by Node.js and is similar to what NuGet is for .NET. Npm makes it easy to install packages via executing a command like:
| |
All packages which you can install, can be found on the official npm site: https://www.npmjs.com/.
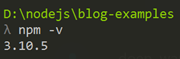
Npm will automatically get installed when with Node.js. Execute the following command to see which version is currently installed on your machine:
| |
This command gives you the following output:
Installing packages
You have a couple of ways to install new packages. The first one was already highlighted above:
| |
For this example, install the express package which is a fast and minimalist web framework: https://www.npmjs.com/package/express
| |
Once you executed the installation command, you will see a Node.js process in your task manager:
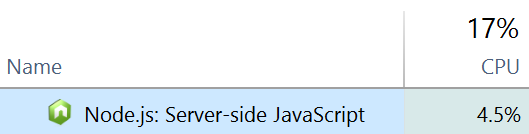
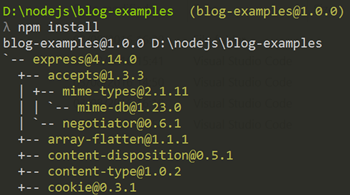
If everything goes well, you have a similar output:
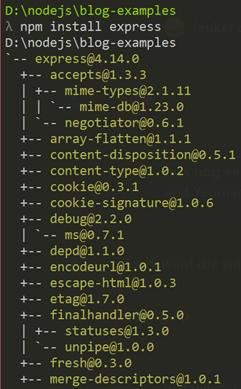
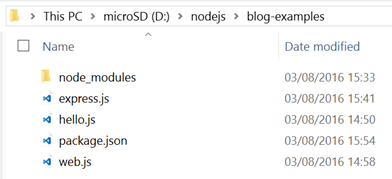
Once executed, all the required modules for this package are downloaded into the node_modules folder, which will get automatically created if it did not exist.
Create a new file called “express.js” and insert the following content:
| |
This does just the same thing as the code in the web.js file, but it is a bit easier to read. Instead of using the HTTP node module, the code now makes use of express.
Info: with express you have a lot more features that can be used like routing, template engine support, and more.
If you run the following command:
| |
You get the following output:

When you navigate to the http://localhost:8080 site, you should see this:

Installing packages and storing dependencies
If you read everything from the npm install output, you might have seen this message at the end:

This warns you that there is no package.json file in the current directory. The package.json file helps you to locally manage which npm packages need or have been installed. In the package.json you can place a couple of useful things:
- Specify project information: name, description, version
- Project dependencies (also for developer dependencies)
- GitHub repository
- License
More information about the package.json file can be found here: https://docs.npmjs.com/getting-started/using-a-package.json
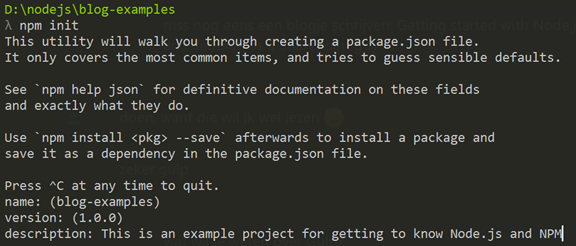
The easiest way to create such a package.json file is by executing the following command:
| |
When you execute this, you will see that it ask you a couple of questions.
When all the question are answered, you end up with a similar package.json file like mine:
| |
Once you have the package.json file in place, you can make use of -save and -save-dev install flags.
–save
The save flag adds the package to the dependency list. These dependencies are the packages that are required in order to run your application.
–save-dev
The save-dev flag adds the package to the developer dependency list. A developer dependency could be a package you only need for building your code. Like for example: a TypeScript transpiler or SASS transpiler.
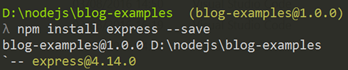
Execute the following command in order to register the dependency when installing:
| |
Once executed, you see the following output:
If you now open the package.json file, you should see that the express dependency has been added:
| |
Installing packages from the package.json file
When you have a package.json file in place and it contains dependencies. You do not have to specify these packages names when reinstalling them. The great thing about it is that npm will automatically check if the package which packages are installed and which have to be downloaded.
As this folder will contain a lot of files very quickly when more and more dependencies are added. Most of the time the node_modules folder gets excluded from source control systems.
When you start from scratch, you only have to execute the following command to install all the dependencies:
| |
You can also test this by removing the node_modules folder in your directory and executing the command. After the command has ran, the node_modules folder should be recreated.
Installing packages globally
The last option is to install packages globally. Most of the time you will do this when you are installing command line tools. Examples are: gulp, grunt, Yeoman, npm itself.
In order to install a package globally you need to specify the -g flag:
| |
Useful resources
- Node.js documentation: https://nodejs.org/en/docs/
- NPM getting started: https://docs.npmjs.com/getting-started/
Getting up to speed series
The files used for this article can be found here: getting up to speed series on GitHub.
Other articles in this series:
- Getting up to speed with Node.js and npm
- Getting up to speed with Gulp
- Getting up to speed with Yeoman aka “yo”
- Getting up to speed with webpack